Decoding Your Haier Washing Machine: Error Codes & Self-Check Guide
Is your Haier washing machine flashing a strange code or not working as expected? Don’t panic! Modern washing machines often have built-in diagnostic systems to help pinpoint problems. This guide will walk you through common Haier washing machine error codes you might encounter and what they means.
Important Safety First! Before attempting any troubleshooting that involves opening panels, checking wiring, or handling internal components, ALWAYS unplug your washing machine from the power outlet. If you are uncomfortable performing any of these checks, or if the problem persists after basic troubleshooting, contact Haier customer support or a qualified appliance repair technician.
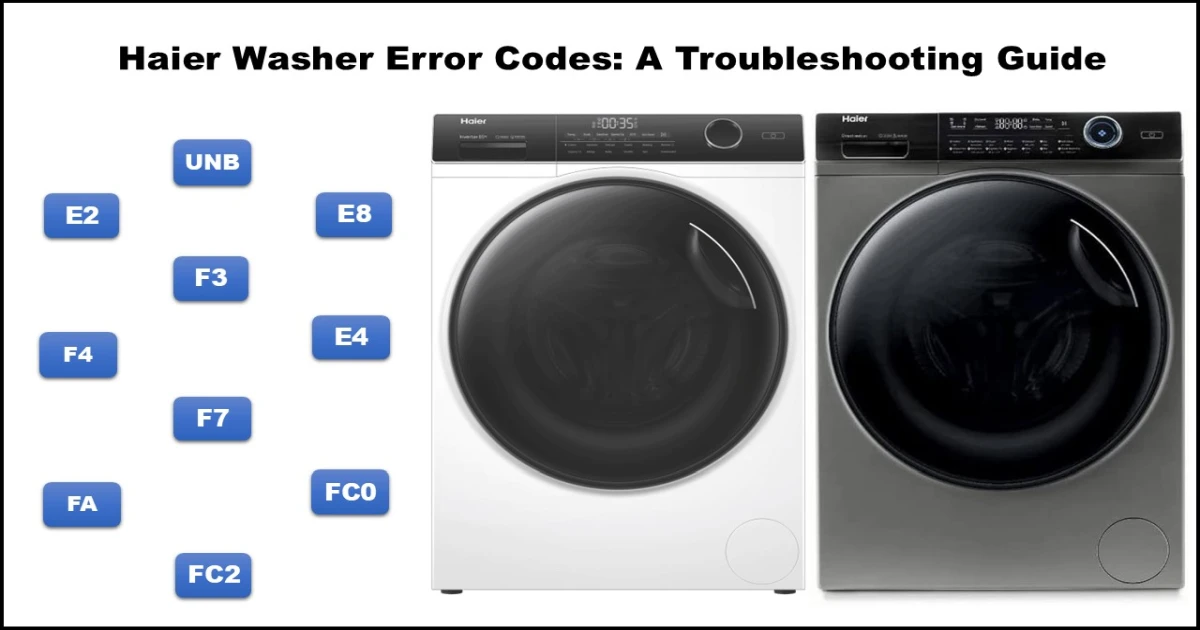
Haier Washing Machine Error Codes Summary
| Error Code | Meaning |
|---|---|
CLR FLTR | Drainage Error (Check filter/drain hose/pump) |
E2 | Door Lock Failure |
F3 | Water Temperature Sensor (NTC) Failure |
E4 | Water Inlet Error (Not filling correctly) |
F4 | Heater Error |
F7 | Motor Error |
E8 | Water Overfill Error (Level too high) |
FA | Water Level Sensor Error |
FC0 / FC2 | Communication Error (Display Board <=> Main PCB) |
FC1 | Communication Error (Main PCB <=> Inverter Board) |
UNB | Unbalanced Load Error (During spin) |
clot / clol- | Child Lock Activated (Notification, not an error) |
Common Haier Washing Machine Error Codes Explained
If your Haier washing machine stops mid-cycle and displays an error code, consult the list below. Remember to unplug the machine before investigating potential causes.
CLR FLTR (Clear Filter)
- Meaning: Drainage Error. The machine failed to drain water within the expected time (approx. 6 minutes).
- Possible Causes:
- Clogged drain pump filter.
- Blocked or kinked drain hose.
- Malfunctioning drain pump.
- Issue with the pressure switch system (not detecting empty drum).
- Faulty main control board (PCB).
- Troubleshooting Steps:
- Safety First: Unplug the washer.
- Clean Filter: Locate and clean the drain pump filter (refer to your user manual for location, usually a small panel at the bottom front).
- Check Hose: Ensure the drain hose is not kinked, crushed, or blocked. Check that the end isn’t pushed too far into the standpipe (can cause siphoning).
- Check Pressure Hose: Inspect the thin hose running to the pressure switch for blockages.
- (Advanced) Check wiring between the drain pump and PCB.
- (Advanced) Check the drain pump resistance (approx. 224 Ω). If incorrect, the pump may need replacement.
- If steps 1-4 don’t resolve it, the issue might be the pump or PCB, likely requiring professional service.
E2 (Door lock switche)
- Meaning: Door Lock Failure. The control board isn’t receiving the signal that the door is securely locked.
- Possible Causes:
- Door not closed properly.
- Faulty door lock mechanism.
- Wiring issue between the lock and the PCB.
- Faulty main PCB.
- Troubleshooting Steps:
- Safety First: Unplug the washer.
- Check Door: Open and close the door firmly. Ensure no clothing is caught in the seal.
- (Advanced) Check the wiring connections between the door lock assembly and the main PCB.
- (Advanced) Check the resistance of the door lock mechanism (approx. 198 Ω). If incorrect, the lock likely needs replacement.
- If the lock seems okay, the issue could be the main PCB.
F3 (Temperature thermistor)
- Meaning: Water Temperature Sensor (NTC) Failure.
- Possible Causes:
- Loose or damaged wiring connection to the sensor.
- Faulty NTC temperature sensor.
- Faulty main PCB.
- Troubleshooting Steps:
- Safety First: Unplug the washer.
- (Advanced) Check the wiring connection between the NTC sensor (usually located near the heater) and the main PCB.
- (Advanced) Check the resistance of the NTC sensor. The resistance changes with temperature (e.g., approx. 9.788 kΩ at 30°C). A reading far off from expected values indicates a faulty sensor.
- If the sensor and wiring seem okay, the main PCB might be the cause.
E4 (Water inlet valve)
- Meaning: Water Inlet Error. The machine failed to fill to the required water level within the expected time (approx. 8 minutes).
- Possible Causes:
- Water taps turned off or low water pressure.
- Kinked or blocked inlet hoses.
- Clogged filter screens inside the water inlet valves (where hoses connect).
- Faulty water inlet valve(s).
- Drain hose positioned too low (causing water to siphon out).
- Pressure sensor hose leak or blockage.
- Faulty main PCB.
- Troubleshooting Steps:
- Safety First: Unplug the washer.
- Check Water Supply: Ensure both hot and cold water taps are fully open and have adequate pressure.
- Check Inlet Hoses: Ensure hoses are not kinked or crushed.
- Check Drain Hose Height: Verify the drain hose outlet is positioned correctly (typically 80-100cm from the floor).
- Clean Valve Filters: Turn off taps, disconnect hoses from the machine, and check/clean the small filter screens inside the valve connections.
- (Advanced) Check the pressure switch hose for leaks or blockages. Clean the air chamber it connects to.
- (Advanced) Check the resistance of the water inlet valve(s) (approx. 4 kΩ).
- If simple checks fail, the issue could be the valve(s) or the main PCB.
F4 (Heater assembly)
- Meaning: Heater Error. Problem detected with the water heating system.
- Possible Causes:
- Loose or damaged wiring connection to the heater.
- Faulty heating element.
- Faulty main PCB (not supplying power to the heater).
- Troubleshooting Steps:
- Safety First: Unplug the washer.
- (Advanced) Check the wiring connections between the heating element and the main PCB.
- (Advanced) Check the resistance of the heating element (approx. 30 Ω). If significantly different (e.g., infinite resistance means it’s broken), it needs replacement.
- (Advanced) If the heater has correct resistance, check if the main PCB is sending voltage to it during the heat cycle (requires caution and multimeter expertise). If no voltage, the PCB may be faulty.
F7 (Drum motor assembly)
- Meaning: Motor Error. Problem detected with the main drive motor.
- Possible Causes:
- Loose or damaged wiring connection between the motor and the control board(s) (main PCB or separate inverter/driver board).
- Faulty motor (DD – Direct Drive, or BLDC – Brushless DC).
- Faulty motor control board (inverter/driver board, if applicable).
- Faulty main PCB.
- Troubleshooting Steps:
- Safety First: Unplug the washer.
- (Advanced) Check wiring connections between the motor and the control board(s).
- (Advanced) Check motor resistance (values vary by model, e.g., DD 8KG ≈ 14.2Ω, DD 9/10KG ≈ 27.5Ω, BLDC ≈ 6.3Ω). Incorrect readings suggest a motor fault.
- If the motor and wiring seem okay, the issue could be the motor control board or the main PCB.
E8 (Overflowing water)
- Meaning: Water Overfill Error. Water level has exceeded the maximum safe level.
- Possible Causes:
- Water inlet valve stuck open (mechanically or due to continuous power).
- Faulty pressure sensor (giving incorrect low reading, causing overfill).
- Blocked pressure sensor hose or air chamber (preventing pressure buildup).
- Faulty main PCB (continuously powering the inlet valve or misreading the sensor).
- Troubleshooting Steps:
- Safety First: Unplug the washer. If possible, turn off water taps.
- Check Water Level: If the drum is actually overfilled, the inlet valve is likely stuck open or being told to stay open by the PCB.
- Check Pressure System: Inspect the pressure sensor hose for blockages, kinks, or leaks. Clean the air chamber it connects to.
- (Advanced) If the drum level is normal but
E8shows, the pressure sensor itself might be faulty. - (Advanced) If water keeps filling even when unplugged (after brief power cycle), the valve is mechanically stuck. If it stops when unplugged but fills continuously when powered, the main PCB might be faulty.
FA (Water pressure sensor)
- Meaning: Water Level Sensor Error. Problem detected with the water level pressure sensor itself.
- Possible Causes:
- Loose or damaged wiring connection to the sensor.
- Leaky pressure sensor hose or blocked pressure chamber.
- Faulty water level sensor.
- Faulty display PCB (if sensor connects there).
- Troubleshooting Steps:
- Safety First: Unplug the washer.
- (Advanced) Check wiring between the water level sensor and the relevant PCB (main or display).
- Check Pressure System: Inspect the pressure sensor hose and air chamber as described under
E8. - If wiring and hose are okay, the water level sensor itself is likely faulty and needs replacement.
- Rarely, the display PCB could be the issue if the sensor connects directly to it.
FC0, FC1, FC2 (Communication failure)
- Meaning: Communication Error. These codes indicate a problem with communication between the different electronic boards within the washer.
FC0/FC2: Error between Display Board and Main Power Board (PCB).FC1: Error between Main Board (PCB) and Inverter Board (motor control).
- Possible Causes:
- Loose or damaged wiring harness/connectors between the boards.
- Faulty Display Board.
- Faulty Main PCB.
- Faulty Inverter Board (for
FC1).
- Troubleshooting Steps:
- Safety First: Unplug the washer.
- (Advanced) Carefully check the wire connections between the relevant boards mentioned by the specific code. Ensure connectors are securely seated and wires aren’t damaged.
- (Advanced – FC1) Check the LED indicator on the inverter board (if accessible). Status (off, flashing, on) can help diagnose if the issue is power supply, the inverter itself, or the main board (refer to service manual specifics if available).
- If connections are good, diagnosing which board is faulty usually requires professional tools or part substitution. Often starts with replacing the display board for FC0/FC2, or the inverter board for FC1, before suspecting the main PCB.
UNB (Unbalanced)
- Meaning: Unbalanced Load Error. The machine detected excessive vibration during the spin cycle, likely due to an unevenly distributed load.
- Possible Causes:
- Laundry clumped together (e.g., large towels, bedding).
- Washing a single heavy item.
- Too small or too large a load for the cycle.
- Machine not level.
- Worn suspension springs or shock absorbers.
- Troubleshooting Steps:
- Redistribute Load: Open the door, manually untangle and redistribute the laundry more evenly in the drum. Avoid washing single heavy items alone.
- Check Load Size: Ensure the load isn’t too small or too large for the machine’s capacity.
- Check Level: Ensure the washing machine is stable and level on the floor. Adjust feet if necessary.
- Retry Spin: Close the door and try restarting the spin cycle.
- If the error persists even with balanced loads, check the suspension components (springs, shock absorbers) for damage – this may require professional help.
clot / clol- (Child Lock)
- Meaning: Child Lock Activated notification. This isn’t an error, but an indicator that the controls are locked.
- Possible Causes:
- Child lock feature was intentionally or accidentally activated.
- Troubleshooting Steps:
- Deactivate Lock: Press and hold the specific button combination for your model to deactivate the child lock. This is often ‘Delay’ and ‘Steam’ (or similar function buttons) held together for 3 seconds. Consult your user manual for the exact combination for your specific Haier model.
Using the Haier Washing Machine Self-Check Mode
The Self-Check mode runs your machine through a series of diagnostic tests to check key components like the door lock, water valves, motor, and sensors.
How to Enter Self-Check Mode:
- Power On: Make sure the washing machine is plugged in and press the Power button.
- Select Program: Turn the program selection knob to any position other than “OFF”.
- Activate Mode: Press and hold the ‘Delay’ button and the ‘Temp’ button simultaneously for at least 2 seconds. The machine should enter Self-Check mode.
Navigating the Self-Check Tests:
Once in Self-Check mode, you’ll use the ‘Extra Rinse’ button to cycle through the basic tests. Specific component tests (like motor run, heating, noise) might require returning to the main self-check screen and pressing other buttons.
- Press ‘Extra Rinse’ (1st time): Door Lock & Model Code Check
- Checks if the door lock mechanism is engaged.
- If the door is properly closed and locked, the machine’s model code will be displayed.
- If there’s an issue with the door lock, it will display
E2.
- Press ‘Extra Rinse’ (2nd time): Program Version Check
- Displays the current software/program version of your washing machine.
- Press ‘Extra Rinse’ (3rd time): Main Wash Water Inlet Check
- Tests the main water inlet valve.
- The display will show
CLOD(likely meaning “Cold”) as water enters through the main wash compartment valve.
- Press ‘Extra Rinse’ (4th time): Softener Box Water Inlet Check
- Tests the softener compartment water inlet valve.
- The display will show
SoFtas water flows into the softener dispenser.
- Press ‘Extra Rinse’ (5th time): All Valves Water Inlet Check
- Opens all water inlet valves simultaneously.
- The display will show
All.
- Press ‘Extra Rinse’ (6th time): End Basic Checks
- Displays
End, signifying the completion of the basic valve and sensor checks accessed via ‘Extra Rinse’.
- Displays
Running Specific Component Tests (From Main Self-Check Menu):
- Run Test (Heating & Spin):
- Press the ‘Delay’ button to return to the main self-check program screen (if you cycled through tests).
- Press the ‘Temp’ button.
- The machine will start a test cycle, running at a specific speed and activating the heater. The current water temperature should be displayed.
- An
E4error during this test indicates the water level is too low (below 20mm).
- Motor Check:
- During the ‘Run Test’, observe if the motor is spinning the drum smoothly.
- If the motor fails to run correctly, an
F7error might be displayed.
- Temperature Sensor Check:
- During the ‘Run Test’ (while heating), watch the temperature display. It should increase dynamically.
- If the temperature doesn’t change or seems incorrect, or if
F3is displayed, there’s likely an issue with the temperature sensor (NTC).
- Noise Check (High-Speed Spin):
- Press the ‘Delay’ button to return to the main self-check program screen.
- Press the ‘Speed’ button.
- The machine will perform a high-speed spin (around 1000rpm) to check for excessive noise or vibration issues.
How to Exit Self-Check Mode:
- Method 1: Turn the program selection knob to the “OFF” position.
- Method 2: Unplug the washing machine from the power outlet.
Still Having Trouble?
This guide covers common issues, but washing machines can be complex. If you’ve tried the basic troubleshooting steps, used the self-check mode, and are still facing problems, or if you encounter an error code not listed here, it’s best to consult your Haier user manual or contact Haier customer support or a qualified appliance repair service.