Hoover Washing Machine: Understanding Error Codes
This guide provides a comprehensive list of common Hoover washing machine error codes, along with clear explanations of what they mean, potential causes, and step-by-step troubleshooting solutions.
Important Safety First! Before attempting any troubleshooting steps, always unplug your washing machine from the power outlet to prevent electrical shock.
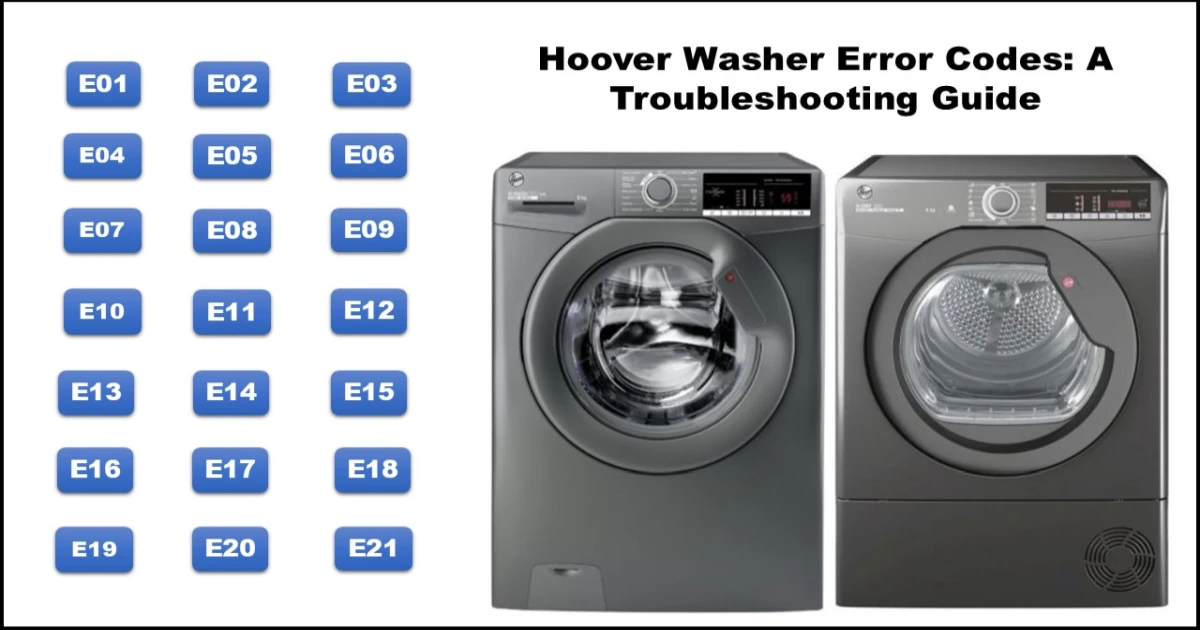
Hoover Washing Machine Error Codes Explained
Here’s a breakdown of the common error codes you might encounter on your Hoover washing machine:
Error 1 or E01: Door Lock Error
- What it means: This error indicates that the washing machine door is not properly locked or there’s an issue with the locking mechanism.
- Possible Causes:
- Damaged or loose wiring and/or connections to the door lock assembly.
- A faulty door safety lock assembly itself.
- A mechanical obstruction or misalignment between the door hook and the door lock assembly.
- A problem with the main control board.
- Troubleshooting Steps:
- Unplug the washing machine.
- Carefully inspect the wiring harness and connectors leading to the door lock assembly for any signs of damage or looseness. Reconnect if necessary.
- Visually examine the door lock assembly for any physical damage.
- Ensure there are no obstructions preventing the door from closing and locking properly.
- For advanced users/technicians: You can check the resistance of the door lock assembly using a multimeter. Refer to the following values (at approximately 25°C):
- Door lock with delayed opening function: ~ 980 Ω
- Door lock with instant opening function: ~ 250 Ω
- If the above steps don’t resolve the issue, the main control board may be faulty and require replacement by a qualified technician.
Error 2 or E02: Solenoid Valve Error (Water Loading Problem)
- What it means: This error indicates that the washing machine is not filling with water correctly.
- Possible Causes:
- Damaged or loose wiring and/or connections to the solenoid valve.
- The main water supply tap is turned off.
- The water supply hose is frozen (especially during winter).
- The water supply hose is kinked, trapped, or the inlet filter screen is clogged.
- A defective solenoid valve.
- A problem with the main control board.
- Troubleshooting Steps:
- Unplug the washing machine.
- Ensure that the main water supply tap connected to the washing machine is fully open.
- Check the water supply hose for any bends, kinks, or obstructions. Straighten the hose if necessary.
- Disconnect the water supply hose from the washing machine and inspect the inlet filter screen for any debris or blockages. Clean the filter if necessary.
- For advanced users/technicians: You can check the resistance of the solenoid valve using a multimeter. The typical value is around 3.8 KΩ.
- Inspect the wiring and connections to the solenoid valve for any damage or looseness.
- If the problem persists, the solenoid valve or the main control board may be faulty and require replacement by a qualified technician.
Error 3 or E03: Drain Pump Error (Drainage Problem)
- What it means: This error indicates that the washing machine is not draining water properly.
- Possible Causes:
- Damaged or loose wiring harness connection to the drain pump.
- A clogged drain filter or a kinked/trapped drain hose.
- A blockage in your household drainage system.
- A faulty drain pump.
- A problem with the main control board.
- Troubleshooting Steps:
- Unplug the washing machine.
- Locate and clean the drain filter. Refer to your washing machine’s manual for instructions on how to access and clean the filter.
- Inspect the drain hose for any kinks, bends, or blockages. Ensure it’s not trapped or crushed.
- Check if your household drain is blocked by trying to drain water from a sink or other appliance.
- For advanced users/technicians: You can check the resistance of the drain pump using a multimeter. The typical value is around 180 Ω.
- Inspect the wiring and connections to the drain pump for any damage or looseness.
- If the issue continues, the drain pump or the main control board may be faulty and require replacement by a qualified technician.
Error 4 or E04: Water Overfilling Error
- What it means: This error indicates that the washing machine has detected an excessive amount of water inside the drum.
- Possible Causes:
- Damaged wiring harness to the pressure switch or water level sensor.
- A faulty water inlet valve that is stuck open, continuously allowing water to enter.
- A damaged or leaking water level sensor hose.
- A blockage or excessive suds in the pressure switch air chamber.
- A faulty water level sensor assembly.
- A problem with the main control board.
- Troubleshooting Steps:
- Unplug the washing machine.
- Inspect the wiring harness connected to the pressure switch or water level sensor for any damage or loose connections.
- Check the water level sensor hose for any signs of leaks, cracks, or blockages. Ensure it’s securely connected.
- Try gently blowing into the pressure switch hose (once disconnected from the machine) to check for any blockages or restrictions.
- For advanced users/technicians: You can check the functionality of the pressure switch.
- If the problem persists, the water inlet valve, water level sensor, or the main control board may be faulty and require replacement by a qualified technician.
Error 5 or E05: NTC Probe Error (Temperature Sensor Issue)
- What it means: This error indicates a problem with the temperature sensor (NTC probe) circuit, suggesting it might be open or shorted.
- Possible Causes:
- Damaged or loose wiring harness connection to the NTC temperature sensor.
- A faulty NTC temperature sensor itself.
- A problem with the main control board.
- Troubleshooting Steps:
- Unplug the washing machine.
- Check the wiring and connections between the NTC sensor and the main control board for any damage or looseness.
- For advanced users/technicians: You can check the resistance of the NTC sensor using a multimeter. The typical value at 25°C (77°F) is around 19.5 kΩ.
- If the resistance is significantly different or there’s no reading, the NTC sensor may be faulty.
- If the wiring and sensor appear to be fine, the main control board may be the issue and require replacement by a qualified technician.
Error 6 or E06: Unbalanced Load Error
- What it means: This error appears when the washing machine detects that the laundry load inside the drum is unevenly distributed.
- Possible Causes:
- Clothes loaded incorrectly, leading to an imbalance during the spin cycle.
- In rare cases, a fault with the EEPROM (Electrically Erasable Programmable Read-Only Memory) on the main control board.
- Troubleshooting Steps:
- Unplug the washing machine.
- Open the door and redistribute the clothes evenly inside the drum. Avoid overloading the machine.
- Ensure that larger items are not bunched up on one side.
- Try running the spin cycle again.
- If the error persists even with a properly balanced load, there might be an issue with the main control board, requiring professional attention.
Error 7 or E07: Door Lock Blocked Error
- What it means: This error indicates a problem preventing the door from unlocking.
- Possible Causes:
- Damaged wiring to the door lock mechanism.
- A fault with the three-phase motor (BLDC motor) in some models.
- A problem with the main control board.
- Troubleshooting Steps:
- Unplug the washing machine.
- Carefully inspect the wiring harness and connections associated with the door lock for any damage or looseness.
- For advanced users/technicians:
- Check that the motor does not have any leakage to earth.
- Verify that the inductor coupled to the three-phase motor does not have any leakage to earth.
- Check the resistance between the phases (X, Y, Z) of the BLDC motor using a multimeter. The typical value is around 4 – 7 Ω.
- Perform a visual inspection of the three-phase electronic card for any damaged components.
- If the above steps don’t resolve the issue, the motor or the main control board may be faulty and require replacement by a qualified technician.
Error 8 or E08 / Error 17 or E17: Motor Tachometer Error (Abnormal Motor Speed)
- What it means: This error indicates that the washing machine has detected an abnormal speed of the motor.
- Possible Causes:
- Damaged or loose wiring harness connection to the tachometer.
- A faulty tachometer.
- A problem with the main control board.
- Troubleshooting Steps:
- Unplug the washing machine.
- Check the wiring and connections between the tachometer and the main control board for any damage or looseness.
- Ensure the motor connector is not bent or improperly connected.
- Check for any laundry or foreign objects that might be blocking the motor or drum rotation.
- For advanced users/technicians: You can check the resistance of the tachometer using a multimeter. Typical values are:
- CESET Tri phase Motor tachometer: ~ 118 Ω
- WELLING Tri phase Motor tachometer: ~ 69 Ω
- If the wiring and tachometer appear to be fine, the main control board may be the issue and require replacement by a qualified technician.
Error 9 or E09: Motor TRIAC/IGBT Error
- What it means: This error indicates a problem with the motor control circuitry (TRIAC for universal models or IGBT/IPM for BLDC models).
- Possible Causes:
- A faulty motor TRIAC (universal models).
- A faulty motor IGBT (Insulated Gate Bipolar Transistor) or IPM (Intelligent Power Module) (BLDC models).
- Troubleshooting Steps:
- Unplug the washing machine.
- Important: Before assuming the main board is faulty, for advanced users/technicians, check the tachometer for any short circuits, as a faulty tachometer can sometimes trigger this error.
- This error typically indicates a more complex electrical issue that requires diagnosis and repair by a qualified technician.
Error 11 or E11: Drying Sensor Error (Dryer Models)
- What it means: This error (found on washer-dryer models) indicates a problem with the drying sensor circuit.
- Possible Causes:
- Damaged or loose wiring connection to the drying sensor.
- A faulty safety thermostat in the drying system.
- A faulty NTC sensor in the drying system.
- A problem with the main control board.
- Troubleshooting Steps:
- Unplug the washing machine.
- Check the wiring and connections between the drying NTC sensor and the main control board for any damage or looseness.
- Check the status of any manual reset safety thermostats in the drying system. If they have tripped, try resetting them (refer to your manual).
- For advanced users/technicians: You can check the resistance of the drying NTC sensor using a multimeter. The typical value at 25°C (298°K) is around 48.5 KΩ.
- If the wiring and sensors appear to be fine, the main control board may be the issue and require replacement by a qualified technician.
Error 12 or E12: Drying System Error (Dryer Models)
- What it means: This error (found on washer-dryer models) indicates an abnormal heating issue within the drying system.
- Troubleshooting Steps:
- Unplug the washing machine.
- Check the wiring and connections between the drying heater and the main control board.
- Check the wiring and connections between the safety thermostat (TOC) and the main control board.
- Check the status of any manual reset safety thermostats in the drying system.
- For advanced users/technicians: You can check the resistance of the drying heater.
- If the wiring and components appear to be fine, the main control board may be the issue and require replacement by a qualified technician.
Error 13 or E13: Communication Error (U.I. Board and Main Board)
- What it means: This error indicates a problem with the communication between the user interface (control panel) board and the main control board.
- Troubleshooting Steps:
- Unplug the washing machine.
- Check the wiring and connections between the user interface board and the main control board for any damage or looseness.
- If the connections are secure, one of the boards (either the user interface board or the main control board) may be faulty and require replacement by a qualified technician.
Error 15 or E15: Empty EEPROM Error
- What it means: This error indicates that the EEPROM (memory chip) on the main control board is corrupted. In some cases, it might incorrectly appear if the main wash NTC sensor is faulty.
- Troubleshooting Steps:
- Unplug the washing machine.
- For advanced users/technicians: Check the main wash heater NTC sensor for any issues (open or shorted circuit).
- Reprogramming the main board is typically required to fix this error. This is a task that should only be performed by authorized service personnel.
- In many cases, the main control board will need to be replaced by a qualified technician.
Error 16 or E16: Heating Element Error
- What it means: This error indicates a problem with the heating element circuit (for washing water).
- Troubleshooting Steps:
- Unplug the washing machine.
- Check the wiring harness connections to the heating element.
- For advanced users/technicians: Check the resistance of the heating element using a multimeter. The typical value is around 23 – 30 Ω.
- If the resistance is outside this range or there is no reading, the heating element may be faulty.
- If the wiring and heating element appear to be fine, the main control board may be the issue and require replacement by a qualified technician.
Error 18 or E18: Power Frequency Error
- Troubleshooting Steps:
- Unplug the washing machine.
- Verify that the power cord voltage and frequency supplied to the washing machine are correct for your region.
- If the power supply is correct, there might be an issue with the main control board, requiring replacement by a qualified technician.
Error 19 or E19: NFC Tag Error
- Troubleshooting Steps:
- Unplug the washing machine.
- Check the NFC module on the washing machine for any damage or loose connections.
- Ensure that NFC is enabled on your smartphone and that the phone is compatible with the washing machine’s NFC functionality.
- Try using the NFC feature again.
- If the issue persists, the NFC module or the user interface board may be faulty and require replacement by a qualified technician.
Error 20 or E20 / Error 21 or E21: APS Error (Pressure Switch Error)
- What it means: These errors (often the same) indicate a problem with the Analog Pressure Switch (APS) or pressure sensor.
- Troubleshooting Steps:
- Unplug the washing machine.
- Check the wiring and connections between the pressure switch and the main control board for any damage or looseness.
- For advanced users/technicians: You can check the functionality of the pressure switch.
- If the wiring and pressure switch appear to be fine, the main control board may be the issue and require replacement by a qualified technician.
Error 22 or E22: Main Wash Heater Error (Similar to E16)
- Troubleshooting Steps:
- Unplug the washing machine.
- Check the wiring and connections between the heater and the main control board.
- For advanced users/technicians: Check the resistance of the heater assembly using a multimeter. A typical value might be around 28 Ω. Ensure it’s not disconnected.
- If the wiring and heater appear to be fine, the main control board may be the issue and require replacement by a qualified technician.
Key LED Indicator: Control Lock Notification
- Control Lock: This feature prevents accidental changes to the washing machine settings, especially useful if you have children.
- To Activate/Deactivate: Press and hold the “TEMPERATURE SELECTION” and “SPIN SELECTION” buttons simultaneously for 3 seconds.
- Important Note: The specific button combination for activating or deactivating the control lock may vary depending on your Hoover washing machine model. Always refer to your Hoover user manual for the exact instructions.
General Troubleshooting Tips
- Check the Basics: Before diving into error codes, ensure the washing machine is properly plugged into a working power outlet and that the water supply is turned on.
- Consult Your Manual: Your Hoover washing machine’s user manual is the best resource for specific information about your model, including detailed troubleshooting steps and error code explanations.
- Power Cycle: Sometimes, simply unplugging the washing machine for a few minutes and then plugging it back in can resolve temporary glitches.
When to Call a Professional
While this guide can help you understand and potentially resolve some common issues, certain Hoover washing machine error codes and troubleshooting steps involve electrical components and may be dangerous if you are not experienced. It’s always best to call a qualified appliance repair technician if:
- You are uncomfortable working with electrical appliances.
- The troubleshooting steps involve checking internal components or using a multimeter if you are not familiar with these tools.
- The error code indicates a problem with the main control board.
- You have tried the suggested solutions and the error persists.
By understanding these Hoover washing machine error codes, you can be better informed about potential problems with your appliance and take appropriate action to get it back up and running. Remember to always prioritize your safety and consult a professional when needed.
