KitchenAid Dishwasher Error Codes: Your Quick Troubleshooting Guide
This guide breaks down common KitchenAid dishwasher error codes, explains what they mean in plain language, and gives you simple steps to troubleshoot the issue. While some problems might require a professional, many can be diagnosed and potentially fixed with a little guidance.
Before You Start: Safety First!
Whenever you’re dealing with appliance repairs, safety is the top priority. Always unplug your dishwasher from the power outlet or turn off the circuit breaker for the dishwasher before you begin any inspection or troubleshooting steps. This prevents the risk of electric shock.
Error Code: F1E1 – Pilot Relay Problem
What it Means: This code indicates an issue with the pilot relay on the main control board. Basically, a small switch on the board that controls power is stuck in the “on” position when it shouldn’t be.
Potential Causes: Often related to issues on the control board itself, such as damaged connections, moisture, or debris.
Troubleshooting Steps:
- Safety First: Ensure the dishwasher is unplugged.
- Inspect the Control Board Wiring: Open the dishwasher’s control panel (usually requires removing screws around the door or kick plate – check your manual). Look closely at the wire connections on the main control board. Are any wires loose, frayed, or look burned? Replace any damaged wires or connectors carefully.
- Check for Moisture or Leaks: Look for any signs of water leaks or moisture on or near the control board. Water and electronics don’t mix and can cause this error. If you find a leak source, you’ll need to fix that first.
- Clean the Control Board (If Comfortable): If you see dirt, debris, or residue on the board, you can gently clean it using a specialized electronic cleaner (like PCB cleaner). Make sure the board is completely dry before plugging the dishwasher back in. This step is for advanced DIYers; be very careful with electronics.
- Consider the Main Board: If the error persists after checking connections and cleaning, the issue is likely with the main control board itself. This part may need to be replaced.
Error Code: F1E2 – Software Glitch
What it Means: This is a software-related error. The control board can’t find essential software information it needs to run properly (like configuration settings for the user interface or the main operating program).
Potential Causes: Incorrectly loaded software or a problem with the control board’s memory.
Troubleshooting Steps:
- Safety First: Ensure the dishwasher is unplugged.
- Replace the Main Board: Unfortunately, for this specific error, the most common and often only solution is to replace the main control board. The software issue is typically integral to the board itself.
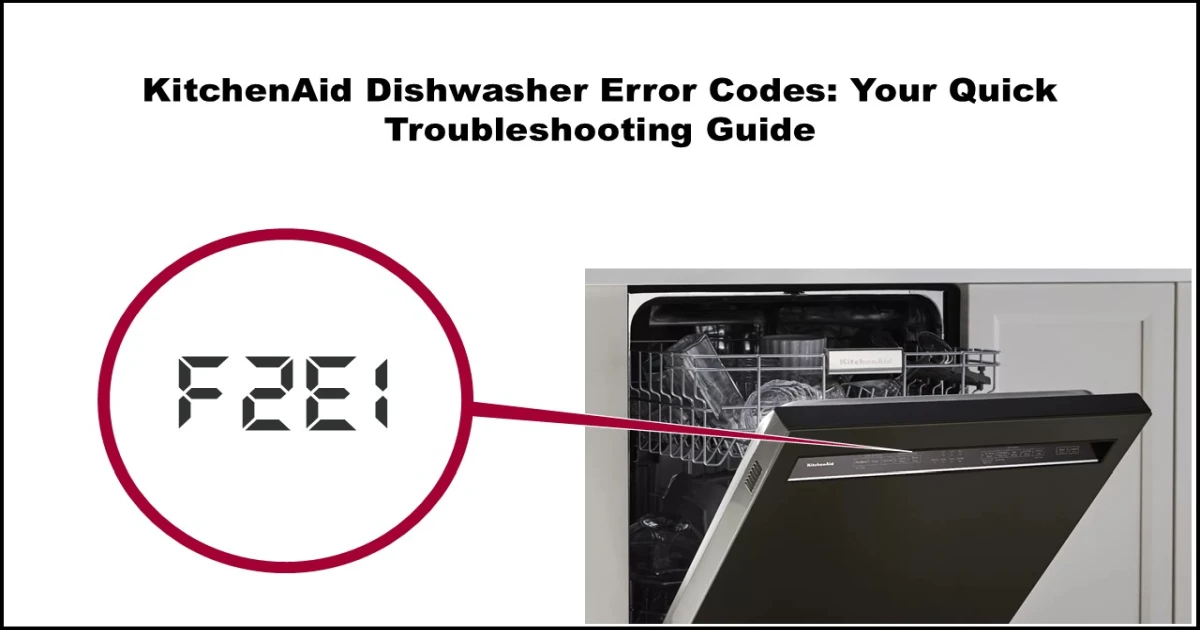
Error Code: F2E1 – Stuck Button
What it Means: This error means one or more buttons on your dishwasher’s control panel are stuck or are constantly being detected as pressed.
Potential Causes: Physical obstruction, damage to the button or cover, or a problem with the underlying electronic switch or wiring.
Troubleshooting Steps:
- Safety First: Ensure the dishwasher is unplugged.
- Inspect the Buttons Visually: Look closely at the buttons on the control panel. Are any physically stuck in? Is there any food debris, liquid residue, or damage around them? Gently try to free any stuck buttons.
- Check the Button Cover: The plastic overlay covering the buttons can sometimes cause issues if it’s damaged or warped.
- Access the Control Panel (If Comfortable): Open the console panel to get a better look at the back of the buttons and the user interface board. Check for misalignment or damage to the button mechanisms or the small switches they activate (micro-switches).
- Inspect User Interface Connections: Check the wire connector that links the user interface (the button panel) to the main control board. Ensure it’s securely plugged in and that the wires aren’t damaged.
- Clean the User Interface (If Comfortable): If there’s visible dirt or residue on the user interface board behind the buttons, you can carefully clean it with an electronic cleaner (PCB cleaner). Allow it to dry completely.
- Isolate the Problem Button: If one specific button seems to be the culprit, and you’re comfortable working with small parts, you might consider replacing just that button or its associated switch if it’s a separate component.
- Check Wires to UI and Main Board: Re-check the wires connecting the user interface panel to the main control board for any signs of damage.
- Consider Replacing the User Interface: If the issue persists after checking and cleaning, the problem might be the entire user interface panel itself.
- Last Resort: Main Board: If replacing the user interface doesn’t fix it, the communication problem causing the “stuck button” signal might originate from the main control board. Replacing the main board could be necessary.
Error Code: F3E1 – Temperature Sensor (Thermistor) Issue
What it Means: This error relates to the temperature sensor (called a thermistor or sometimes OWI/NTC depending on the model) that tells the dishwasher how hot the water is. F3E1 means the sensor isn’t providing valid temperature readings – either the circuit is broken (open) or there’s an electrical short causing incorrect readings.
Potential Causes: Faulty thermistor, damaged wiring, or a problem with the control board reading the sensor.
Troubleshooting Steps:
- Safety First: Ensure the dishwasher is unplugged.
- Check Thermistor Connector: Locate the thermistor (often near the heating element or wash pump). Make sure its wire connector is securely plugged in and free of dirt or corrosion.
- Inspect Thermistor Wiring: Follow the wires from the thermistor back to the control board. Look for any cuts, kinks, or loose connections. Repair or replace damaged wires.
- Test the Thermistor’s Resistance (Requires Multimeter): This step requires a multimeter. Disconnect the thermistor and measure its resistance (in Ohms, Ω) at room temperature (around 25°C / 77°F). Compare your reading to the expected value provided by the manufacturer. For a standard NTC thermistor at 25°C, it should be around 47.1 KΩ (47,100 Ohms). If your reading is significantly different (like zero or infinite), the thermistor is likely faulty and needs replacement.
- Last Resort: Main Board: If the thermistor connector, wiring, and resistance all seem fine, the main control board might not be correctly reading the sensor data. Replacing the main board could resolve the issue.
Error Code: F3E2 – Water Sensor (OWI) Calibration or Detection Failure
What it Means: This error code indicates a problem with the OWI (Optical Wash Indicator) sensor. This sensor checks the water clarity (how dirty it is) and also helps detect the presence of water. F3E2 means it couldn’t calibrate correctly or isn’t detecting water when it should.
Potential Causes: Dirty OWI sensor, poor connection, or a faulty sensor/control board.
Troubleshooting Steps:
- Safety First: Ensure the dishwasher is unplugged.
- Clean the OWI Sensor: Locate the OWI sensor (usually at the bottom of the tub near the drain). This sensor is prone to getting coated with food particles, grime, or limescale. Gently clean the sensor according to your manual’s instructions. Make sure it’s sparkling clean.
- Prevent Future Buildup: Advise on using the correct amount of detergent, potentially running a self-cleaning cycle regularly, or using a dishwasher cleaner to prevent buildup.
- Check OWI Sensor Connection: Ensure the wire connector for the OWI sensor is securely plugged into the main control board. Check the wires for damage.
- Consider Replacing the OWI Sensor: If cleaning the sensor and checking connections don’t help, the OWI sensor itself might be faulty and need replacement.
- Last Resort: Main Board: If the issue persists even after replacing the OWI sensor, the problem might lie with the main control board’s ability to read the sensor.
Error Code: F4E2 – Heater Relay Stuck Open (Not Heating)
What it Means: These codes relate to the dishwasher’s heating system.
- F4E2: The relay (an electronic switch) that turns on the heating element is stuck open. This means the heater won’t turn on, and the water won’t get hot during the cycle. This error is often detected during diagnostic tests.
- F4E3: The heater relay is stuck closed. This means the heating element stays on constantly, even when it shouldn’t be, causing the water temperature to get too high.
Potential Causes: Faulty heater relay on the main board, damaged heating element, issues with temperature sensors, or wiring problems.
Troubleshooting Steps:
- Safety First: Ensure the dishwasher is unplugged.
- Inspect Heater Wiring: Check the wire harness connected to the heating element at the bottom of the tub. Look for any signs of burning, damage, or loose connections. Secure any loose wires and replace damaged ones.
- Test Heater Resistance (Requires Multimeter): Disconnect the heater’s connector from the control board (or heating element itself). Measure the resistance (in Ohms, Ω) across the two terminals of the heating element. It should be around 26 Ω at room temperature. A reading far from this indicates a faulty heating element.
- Check for Heater Grounding (Requires Multimeter): With the dishwasher unplugged, measure the resistance between one of the heating element terminals and the dishwasher’s bare metal body. The reading should show “OL” or infinite resistance (open circuit). If you get a low resistance reading, it means the heating element is shorted to the chassis, which can damage the control board. If grounded, you’ll likely need to replace both the heating element and the main control board.
- Check Temperature Sensor (NTC/OWI) Resistance: The temperature sensor (NTC thermistor or OWI) provides feedback to the control board about the water temperature. If this sensor is faulty, it can cause heating issues or incorrect error codes.
- Consider the Main Board: Since the heater relay is on the main control board, if the heater element and sensors test fine, the main board is the likely culprit, especially for the F4E2 (stuck open) error. For F4E3 (stuck closed), while it could be the relay, a grounded heater element (step 4) often damages the board causing this symptom.
Error Code: F5E1 – Door Switch Stuck Open
- Related Error: F5E2 – Door Switch Stuck Closed
What it Means: These errors relate to the door latch and switch mechanism that tells the dishwasher whether the door is open or closed.
- F5E1: The dishwasher thinks the door is always open, even when it’s closed and latched.
- F5E2: The dishwasher thinks the door is always closed, even when it’s open.
Potential Causes: Faulty door latch/switch mechanism, physical obstruction, or wiring issues.
Troubleshooting Steps:
- Safety First: Ensure the dishwasher is unplugged.
- Inspect the Door Latch: Visually check the door latch mechanism (the part on the door and the part it latches into on the dishwasher body). Look for any broken plastic pieces, misalignment, or anything that might be physically blocking the latch from engaging correctly.
- Ensure Door is Fully Closed: Sometimes, the door isn’t quite shut all the way. Firmly close the door until you hear or feel it latch. Try starting a cycle to see if the error clears.
- Test the Door Switch Resistance (Requires Multimeter): Locate the door switch (part of the latch assembly). Disconnect its wire connector from the control board. Using a multimeter, measure the resistance across the switch terminals with the door closed. It should be very low, close to 0.1 Ω. If it’s infinite (“OL”) with the door closed, the switch is faulty. You might also test it with the door open – the resistance should be infinite.
- Check Door Switch Wiring: Inspect the wires and connectors running from the door switch back to the main control board. Look for damage or loose connections.
- Consider Replacing the Door Switch: If the latch looks fine but the resistance test fails or the problem persists, the door switch itself likely needs replacement.
- Last Resort: Main Board: If replacing the door switch doesn’t resolve the issue, the main control board might not be correctly interpreting the signal from the switch.
Error Code: F6E1 – User Interface (UI) Communication Failure
What it Means: This code means the main control board and the user interface (the panel with buttons and display on the door) are not communicating with each other properly.
Potential Causes: Loose or damaged connecting cable, faulty user interface board, or a problem with the main control board’s communication circuit.
Troubleshooting Steps:
- Safety First: Ensure the dishwasher is unplugged.
- Try Clearing the Error: Sometimes, a simple power cycle or pressing certain buttons can reset a temporary communication glitch. Refer to your manual on how to clear error codes (often involves pressing and holding a specific button combination).
- Inspect UI to Main Board Connection: Open the console panel to access the user interface board and the main control board (you might need to access the main board from the kick plate area). Locate the ribbon cable or wire harness connecting the two boards. Ensure it is securely plugged in at both ends. Gently unplug and replug it to ensure a good connection.
- Check Cables and Connectors for Damage: Look closely at the connecting cable and its connectors for any signs of damage, cuts, corrosion, or bent pins. If the cable is damaged, it will need to be replaced.
- Inspect Connectors on Boards: Examine the sockets on both the user interface board and the main control board where the cable plugs in. Look for any debris or damaged pins.
- Consider Replacing the User Interface: If the cable connection is good and undamaged, the user interface board itself might be the source of the communication failure.
- Last Resort: Main Board: If replacing the user interface doesn’t fix the communication error, the main control board’s communication circuit is likely the problem.
Error Code: F7E1 – Variable Speed Motor (VSM) Communication Failure
What it Means: This error means the main control board isn’t properly communicating with the Variable Speed Wash Motor (VSM), which controls the spray arms. This motor can change speeds to optimize washing.
Potential Causes: Loose or damaged wiring between the motor and control board, a problem with the motor itself, or an issue with the main control board.
Troubleshooting Steps:
- Safety First: Ensure the dishwasher is unplugged.
- Inspect Motor to Main Board Connection: Locate the wash motor (usually under the tub) and the main control board. Find the wire harness connecting the motor to the board. Check that the connector is securely plugged in at both ends. Unplug and replug to ensure a good connection.
- Check Motor Wiring and Connectors: Examine the wires and connectors in the motor harness for any damage, cuts, or signs of overheating.
- Inspect VSM Board Cables (If Applicable): Some models might have a separate small control board specifically for the VSM. If yours does, check its power and communication cables for damage or loose connections.
- Check for Simple Obstructions: While not a direct cause of the communication error, clogged spray arms or a dirty filter can cause the motor to struggle, which might indirectly affect its communication. Clean the spray arm holes and the fine filter at the bottom of the tub.
- Test Wash Motor Resistance (Requires Multimeter): This is for more advanced DIYers. Disconnect the wash motor’s wire harness. Measure the resistance across the motor terminals. The expected values vary depending on the motor type (VSM or single-phase) and coils (main/aux).
- VSM Motor: Around ~52 ΩSingle Phase (Non-VSM): MAIN coil ~ 8 Ω, AUX coil ~ 11 Ω. (Also check the capacitor if it has one, often 20 μF).
- Last Resort: Main Board: If all connections are secure, the wiring is intact, and the motor’s resistance is within specification, the main control board is likely unable to communicate with the motor.
Error Code: F8E1 – No Water Detected
- Related Error: F8E2 – Fill Valve Error
What it Means: These codes indicate problems with the dishwasher filling with water.
- F8E1 (Same as H2O error): The dishwasher expected to detect water in the tub but didn’t.
- F8E2: The control board tried to activate the fill valve but didn’t detect the electrical current draw it expected, suggesting the valve isn’t opening or the circuit is broken.
Potential Causes: Water supply off, clogged inlet filter, low water pressure, siphoning from drain hose, faulty fill valve, or wiring issues.
Troubleshooting Steps:
- Safety First: Ensure the dishwasher is unplugged.
- Check Water Supply: Is the water tap supplying the dishwasher turned on? Is the water line kinked? Is your home’s water pressure sufficient?
- Check Inlet Hose Filter: Unscrew the water inlet hose from the dishwasher (and potentially from the tap, turn off the water first!). There’s usually a small screen filter inside the connector. Check if it’s clogged with sediment and clean it if necessary.
- Inspect Fill Valve Wiring: Locate the water inlet valve (where the water hose connects to the dishwasher). Check its wire connections to the control board for security and damage.
- Test Fill Valve Resistance (Requires Multimeter): Disconnect the fill valve’s wire connector. Measure the resistance (in Ohms, Ω) across the valve terminals. For a 120V valve, it should be around 1.4 KΩ (1400 Ohms). If it’s significantly different, the valve is likely faulty.
- Check Drain Hose Position (Siphoning): Ensure the drain hose is installed correctly according to your manual. If the drain hose opening is too low or the hose dips down significantly after leaving the dishwasher, it can create a siphoning effect that drains water out as quickly as it fills, leading to a “no water detected” error. The hose usually needs to loop up high under the sink or be connected to a standpipe above a certain height.
- Last Resort: Main Board: If the water supply is good, the filter is clean, the fill valve tests correctly, and the drain hose is positioned properly, the main control board might not be correctly sending power to the valve or reading the water sensor.
Error Code: F8E3 – Low Water or Suds Issue
What it Means: This error suggests the dishwasher is detecting excessive suds or a low water level, causing the wash pump to work harder than it should (surge). The OWI sensor often detects this condition.
Potential Causes: Too much detergent, wrong type of detergent, missing dispenser gasket, clogged spray arms, or a dirty OWI sensor.
Troubleshooting Steps:
- Safety First: Ensure the dishwasher is unplugged.
- Check Detergent Usage: This is the most common cause. Are you using the correct type and amount of detergent? Using too much, using liquid dish soap instead of dishwasher detergent, or using poor-quality detergent can cause excessive suds. Also, too much rinse aid can contribute. Reduce the amount of detergent/rinse aid used.
- Inspect the Detergent Dispenser: Check if the detergent dispenser cup gasket is in place and undamaged. A faulty dispenser could release detergent too quickly.
- Check Spray Arms: Ensure the spray arm holes are not clogged with food particles. Clogged arms reduce water flow, which can mimic a low water condition or cause the pump to surge. Clean the spray arms.
- Clean the OWI Sensor: As mentioned in F3E2, a dirty OWI sensor (caked with grime or limescale) might incorrectly report water conditions. Clean the OWI sensor carefully.
Error Code: F8E4 – Overflow Detected
What it Means: This indicates that water has overflowed from the wash tub and has been detected in the drip tray at the bottom of the dishwasher by a float sensor.
Potential Causes: Leaking components (hose, pump seal, valve), stuck fill valve, or a stuck float switch.
Troubleshooting Steps:
- Safety First: Ensure the dishwasher is unplugged.
- Check the Drip Tray: Carefully pull the dishwasher out or access the area underneath. Is there water in the drip tray located below the main tub? If yes, you need to find the source of the leak. Mop up any water found.
- Inspect the Float Switch: In the drip tray, there’s a float (often a piece of foam or plastic) and a small switch (microswitch). Check if the float is stuck in the “up” position due to a physical obstruction (like a screw, wire, or debris) or if the drip tray itself is bent, pushing the float up. Clear any obstructions.
- Test the Float Switch (Requires Multimeter): Disconnect the float switch connector. Use a multimeter to check the microswitch. It should be in one state (open or closed) when the float is down and switch to the other state when the float is manually pushed up. If it doesn’t switch correctly, it’s faulty.
- Check Float Switch Wiring: Inspect the wire harness connection between the float switch and the control board for damage or looseness.
- Find the Water Leak Source: Crucially, you must find out why water got into the drip tray. Look for leaks from the door seal, wash pump seal, water inlet valve, drain pump, or hoses. Fix any leaks found.
- Last Resort: Main Board: If the float switch tests correctly and you cannot find any leak source (though this is less likely), the main control board might be misinterpreting the sensor signal.
Error Code: F8E5 – Fill Valve Stuck Open
What it Means: The dishwasher’s flow meter (which measures how much water is entering) is detecting water flow even when the fill valve should be closed. This means the fill valve is likely stuck open or not sealing properly.
Potential Causes: Faulty fill valve or a problem with the main control board sending a signal to open the valve when it shouldn’t.
Troubleshooting Steps:
- Safety First: Ensure the dishwasher is unplugged.
- Turn Off Water & Reset: Turn off the water supply valve to the dishwasher. Leave the dishwasher unplugged or the breaker off for a few minutes. Re-open the water tap.
- Check for Continuous Flow: With the water tap open but the dishwasher still off (no cycle running), listen and look for water continuously flowing into the tub. If water is still entering, the fill valve is definitely stuck open.
- Replace the Fill Valve: If water flows continuously when the dishwasher is off but the water tap is open, you need to replace the water inlet fill valve.
- Test Main Board (Less Likely): If water does not flow continuously when the unit is off but the tap is open, but the F8E5 code still appears when you try to run a cycle, the main board might be sending a constant “open” signal to the valve. This is less common, but the main board could be the issue in this specific scenario.
Error Code: F8E6 – Flowmeter Error
What it Means: Water is entering the dishwasher, but the flow meter sensor (which counts pulses as water passes through) isn’t registering any flow pulses. This means the flow meter isn’t working correctly.
Potential Causes: Faulty flow meter, wiring issue to the flow meter, or a problem with the control board reading the flow meter signal.
Troubleshooting Steps:
- Safety First: Ensure the dishwasher is unplugged.
- Inspect Flowmeter Connection: Locate the flow meter (usually near the water inlet valve). Check its wire connection to the control board for looseness or damage.
- Verify Flowmeter Turbine Spins (Requires Observing): With the dishwasher filling, try to visually confirm (if possible and safe to do so temporarily with power applied and panels removed) that the small turbine inside the flow meter is spinning as water flows. If it’s not spinning, the flow meter is mechanically stuck or broken.
- Check Flowmeter Voltage (Requires Multimeter): This is for advanced DIYers. With the dishwasher attempting to fill and power on (be extremely cautious due to live voltage!), measure the voltage supplied to the flow meter. It should receive approximately +5 Vdc. If the voltage is absent or incorrect, the main board is likely the problem.
- Test Flowmeter with Magnet (Requires Magnet & Meter/Observation): Some flow meters use a magnetic sensor. You can sometimes test this by holding a magnet near the sensor part of the flow meter while manually spinning the turbine (if accessible) or while water is flowing. If the flow meter is connected to a meter that can read pulses, you should see pulses generated. This test is more complex.
- Consider Replacing the Flowmeter: If the connections are good and the flow meter turbine isn’t spinning or not producing pulses, the flow meter assembly likely needs replacement.
- Last Resort: Main Board: If the flow meter is receiving the correct voltage but isn’t producing pulses (and the turbine is spinning freely), or if the voltage is incorrect, the main control board might be faulty.
Error Code: F9E1 – Drainage Error
- Related Errors: F7E4 (Clogged Filter), F9E2 (Drain Pump Error)
What it Means: This is a general drainage problem. The dishwasher isn’t draining properly or at all.
- F7E4: Often a precursor or cause of F9E1, specifically indicating a clogged filter.
- F9E2: Points directly to an issue with the drain pump itself.
Potential Causes: Clogged filter or drain path, faulty drain pump, siphoning, or wiring issues.
Troubleshooting Steps:
- Safety First: Ensure the dishwasher is unplugged.
- Check for F8E5 (Fill Valve Stuck Open): As the original text mentions, if you also have F8E5, fix that first, as it could cause water to keep entering and overwhelm the drain.
- Check and Clean Filters: Remove and thoroughly clean the dishwasher’s filters at the bottom of the tub (coarse and fine filters). These are the most common culprits for drainage issues.
- Check Drain or Spray Pump Housing: After cleaning filters, look down into the drain opening and inside the wash pump housing (where the spray arms get water from) for any large food particles, broken glass, or other debris blocking the path to the drain pump impeller. Use caution with sharp objects.
- Check Drain Hose: Ensure the drain hose isn’t kinked, crushed, or blocked. Check the connection under the sink – make sure the standpipe or air gap isn’t clogged. As mentioned in F8E1, ensure the drain hose has a proper high loop to prevent siphoning.
- Check Siphon Outlet: If connected to a garbage disposal or sink trap, ensure the connection point is clear. Some garbage disposals have a plug that must be removed before connecting a dishwasher drain hose.
- Check for Excessive Suds: High suds levels (see F8E3) can also interfere with draining. Use less detergent or a different type.
- Inspect Drain Pump Wiring: Locate the drain pump (usually at the front, bottom of the dishwasher behind the kick plate). Check its wire harness connection for looseness or damage.
- Test Drain Pump Resistance (Requires Multimeter): Disconnect the drain pump wire harness. Measure the resistance (in Ohms, Ω) across the pump terminals. For a 120V pump, it should be around 30 Ω.
- Check OWI Sensor (Again): A very dirty OWI sensor might sometimes contribute to drainage issues by misinterpreting water levels or clarity. Clean the OWI sensor.
- Check Spray Arms: Ensure spray arm holes are clear; clogs can sometimes indirectly affect circulation needed for draining in some designs.
- Last Resort: Main Board: If filters, hoses, pump wiring, and pump resistance are all fine, the main control board might not be sending the correct signal to the drain pump.
Error Code: F10E1 – Dispenser Error
What it Means: This code indicates a problem with the automatic detergent and/or rinse aid dispenser not opening correctly during the cycle.
Potential Causes: Faulty dispenser mechanism (wax motor or solenoid), damaged wiring, or a problem with the control board activating the dispenser.
Troubleshooting Steps:
- Safety First: Ensure the dishwasher is unplugged.
- Inspect Dispenser Wiring: Locate the wire connection going to the dispenser unit on the back of the door. Check for loose or damaged wires and connectors.
- Test Dispenser Resistance (Requires Multimeter): Disconnect the dispenser wire harness. Measure the resistance (in Ohms, Ω) across the dispenser terminals (there might be separate terminals for detergent and rinse aid). For a typical 120V dispenser, the resistance should be around 340 Ω. A significantly different reading indicates a faulty dispenser mechanism.
- Consider Replacing the Dispenser: If the wiring is good and the resistance is off, the dispenser assembly itself is likely the problem.
- Last Resort: Main Board: If the dispenser tests correctly but still doesn’t open, the main control board might not be sending the activation signal.
Error Code: F10E2 – Vent Wax Motor Error
What it Means: This applies to models with an active drying vent (often with a fan). The code means the “wax motor” mechanism that opens and closes this vent isn’t working properly. The wax motor expands when heated electrically, pushing a pin that opens the vent.
Potential Causes: Faulty wax motor, wiring issue, or a problem with the control board activating the vent.
Troubleshooting Steps:
- Safety First: Ensure the dishwasher is unplugged.
- Inspect Vent Wax Motor Wiring: Locate the vent assembly (often on the side or top of the tub) and the wax motor attached to it. Check its wiring and connector for damage or looseness.
- Test Wax Motor Resistance (Requires Multimeter): Disconnect the wax motor harness. Measure the resistance (in Ohms, Ω) across the motor terminals. It should be around ~1-3 KΩ (1000-3000 Ohms). A reading outside this range indicates a faulty wax motor.
- Consider Replacing the Vent Wax Motor: If wiring is fine and resistance is off, replace the wax motor.
- Last Resort: Main Board: If the wax motor tests correctly but doesn’t operate, the main board might not be sending the activation signal.
Error Code: F10E3 – Drying Fan Error
What it Means: This applies to models with a dedicated drying fan. The code indicates the drying fan is not running or is not being detected by the control board.
Potential Causes: Faulty drying fan motor, wiring issue, or a problem with the control board.
Troubleshooting Steps:
- Safety First: Ensure the dishwasher is unplugged.
- Check Drying Fan Wiring: Locate the drying fan assembly and check its wiring and connector for damage or looseness.
- Test Drying Fan Resistance (Requires Multimeter): Disconnect the fan harness. Measure the resistance (in Ohms, Ω) across the fan terminals. For a 13Vdc fan, it should be around 150 KΩ (150,000 Ohms). Note that this is a much higher resistance than motors or solenoids.
- Consider Replacing the Drying Fan: If wiring is fine and resistance is off, replace the drying fan.
- Last Resort: Main Board: If the fan tests correctly but doesn’t run, the main board might not be sending the activation signal.
Error Code: F10E4 – Diverter Position Sensor or Motor Error
- Related Error: F10E5 – Stuck Diverter Motor Error
What it Means: These codes apply to models with a “Diverter Valve.” This valve directs water flow to different spray arms (e.g., lower rack only, upper rack only, or both) for optimized cleaning.
- F10E4: The diverter motor is running, but the sensor isn’t detecting that the valve is reaching its expected positions.
- F10E5: The sensor detects that the diverter motor is moving when it shouldn’t be (stuck in between positions, often due to a leak or mechanical issue).
Potential Causes: Faulty diverter motor, faulty position sensor, damaged wiring, mechanical blockage in the valve, or a main board problem.
Troubleshooting Steps:
- Safety First: Ensure the dishwasher is unplugged.
- Inspect Wiring: Locate the diverter valve assembly (usually at the bottom of the tub, near the wash pump). Check its wiring and connectors for damage or looseness. Repair or replace any faulty wires.
- Test Diverter Motor Resistance (Requires Multimeter): Disconnect the diverter motor harness. Measure the resistance (in Ohms, Ω) across the motor coil terminals.
- Check Diverter Position Sensor Feedback (Requires Multimeter/Advanced): This step is more technical. The position sensor provides feedback (often changes between open/closed circuit or voltage levels) as the diverter moves. You’d need to check the resistance or voltage on the feedback wires while manually moving the diverter (if possible) or during a cycle attempt. Ensure the connector is secure.
- Check Feedback Voltage (Requires Multimeter & Power – Use Caution): With power on (extreme caution!), check if the feedback wire from the sensor is receiving the expected +5VDC reference voltage from the control board. If not, the main board might be the issue.
- Check for Mechanical Issues/Leaks: Inspect the diverter valve itself for any physical damage or obstructions preventing it from rotating fully. Check for leaks around the diverter seal, as leaks can get into the motor/sensor housing and cause F10E5. Replace seals if leaking.
- Consider Replacing Diverter Assembly: If wiring, resistance, and voltage are fine but the valve isn’t moving correctly or the sensor isn’t reporting positions, the entire diverter valve assembly (motor and sensor) likely needs replacement.
- Last Resort: If all components of the diverter assembly test correctly, the main control board might be failing to control or read the diverter.
Conclusion
KitchenAid dishwasher error codes are designed to help you figure out what’s going on when your appliance isn’t running smoothly. By understanding what each code means and following these systematic troubleshooting steps, you can often diagnose the problem yourself.
Remember to always prioritize safety by unplugging the dishwasher before attempting any repairs. Start with the simplest checks (connections, visible obstructions, cleaning) and move to more technical steps (like measuring resistance) if you’re comfortable and have the right tools.
