Troubleshooting Candy Dishwasher Error Codes
Like any modern appliance, your Candy dishwasher is equipped with a sophisticated system that can detect malfunctions and communicate them to you via error codes. These codes are invaluable tools for diagnosing problems and can often help you resolve issues without needing a service technician. This guide provides a detailed breakdown of common Candy dishwasher error codes, their potential causes, and practical troubleshooting steps.
Before you begin any troubleshooting, always unplug your dishwasher from the power source to ensure safety.
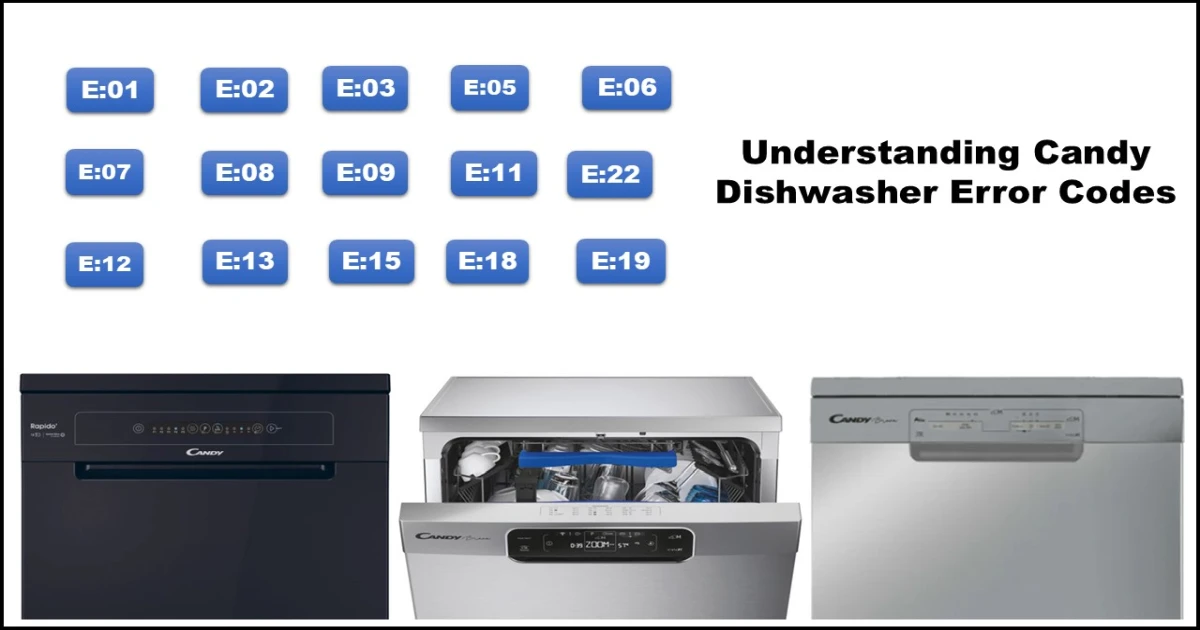
Here are the common Candy dishwasher error codes you might encounter:
E:02 or E2: Water Solenoid Valve Error
Description: The dishwasher is not filling with water, or the water intake is taking too long. This indicates an issue with the water supply or the inlet valve.
Potential Causes:
- The water faucet supplying the dishwasher is closed.
- Insufficient water pressure (should be between 0.8 and 8 Bar).
- The fill hose is bent, kinked, or clogged.
- The air pressure trap is clogged, preventing proper water level detection.
- Faulty electrical connectors to the inlet valve or control board.
- A defective water inlet valve itself.
- A faulty main electronic control board (PCB).
Solutions:
- Check the Water Supply: Ensure the water tap connected to the dishwasher is fully open.
- Inspect the Fill Hose: Examine the fill hose for any kinks, bends, or obstructions. Straighten the hose if necessary.
- Clean the Inlet Hose Filter: There is usually a filter where the fill hose connects to the dishwasher or the water tap. Turn off the water supply, disconnect the hose, and clean the filter screen of any debris.
- Verify Water Pressure: If possible, check the water pressure from the tap to ensure it’s within the recommended range.
- Check the Solenoid Valve: With the power unplugged, you can visually inspect the water inlet valve and its connectors for any obvious damage or loose wiring. For electrical checks, proceed with caution or consult a professional. The water inlet valve typically has an ohmic value of around 4060 Ω.
- Address Clogged Air Trap: Cleaning the air pressure trap might require some technical skill. Refer to your dishwasher’s manual or seek professional help if you are unsure.
- Check for Faulty Connectors: Inspect the electrical connectors to the water inlet valve and the main PCB for corrosion or looseness.
- Replace Faulty Inlet Valve: If the valve is suspected to be faulty and other checks pass, it may need replacement.
- Replace Main PCB: If none of the above steps resolve the issue, the main PCB might be defective and require replacement.
E:03 or E3: Drain Pump Error
Description: The dishwasher is not draining water correctly, or the draining process is taking too long.
Potential Causes:
- A faulty wire harness connection to the drain pump or PCB.
- Clogged filters (main filter, sump filter), drain hose, or the kitchen sink siphon connection.
- A defective drain pump.
- A faulty main electronic control board (PCB).
Solutions:
- Check and Clean Filters: Ensure the main filter and sump filter inside the dishwasher are clean and free of debris.
- Inspect the Drain Hose: Check the drain hose for kinks, blockages, or proper connection to the under-sink plumbing. Ensure the end of the hose is not submerged in standing water in the drain pipe.
- Check the Wall Drain/Siphon: Verify that the kitchen sink drain and siphon are not clogged.
- Check the Drain Pump: With the power unplugged, inspect the drain pump for any foreign objects that might be blocking the impeller. For electrical checks, proceed with caution. The drain pump typically has an ohmic value of around 217 Ω.
- Check the Pressure Switch: A faulty pressure switch can sometimes cause draining issues by incorrectly sensing the water level.
- Replace Faulty Drain Pump: If the pump is suspected to be faulty after inspection and checks, it may need replacement.
- Replace Main PCB: If the problem persists after checking the above components, the main PCB could be the cause.
E:04 or E4: Water Leakage Error
Description: The anti-flood system (MIPS – Micro Intelligent Protection System) has detected water in the base of the dishwasher. This system is activated when a water leak occurs.
Potential Causes:
- A faulty wire harness related to the MIPS sensor.
- An actual water leak from a component or hose.
- Damaged or deteriorated water hoses.
- A faulty MIPS (overflow) switch that is triggering the error incorrectly.
Solutions:
- Unplug and Inspect: Unplug the dishwasher and carefully pull it out. Inspect the area underneath and around the dishwasher for any visible signs of water leakage.
- Identify the Leak Source: If a leak is found, try to identify its origin. Common sources include damaged hoses, seals, the water inlet valve, or the drain pump.
- Check Wire Harness Connector: Inspect the wire harness connector to the MIPS sensor for any disconnections or damage.
- Check Drain Pump Condition: While E03 specifically addresses drain pump function, a damaged drain pump housing or seal can cause leaks, leading to an E04 error.
- Replace Leaking Components/Hoses: If a leak source is identified, the damaged component or hoses must be replaced.
- Check MIPS Switch and Main PCB: If there is no visible water leakage but the error persists, the overflow switch (MIPS) might be faulty or the main PCB is incorrectly interpreting a signal. These components may need to be checked or replaced by a qualified technician.
E:05 or E5: NTC Sensor Error
Description: The NTC (Negative Temperature Coefficient) sensor, which measures the water temperature, is reporting an error. This can prevent the dishwasher from heating water correctly.
Potential Causes:
- A faulty wire harness connection to the NTC sensor or main PCB.
- A defective NTC sensor itself.
- A faulty main electronic control board (PCB).
Solutions:
- Check Wire Harness Connector: Inspect the wire harness connector to the NTC sensor for proper connection and signs of damage.
- Check NTC Sensor Resistance: With the power unplugged, you can test the resistance of the NTC sensor using a multimeter. The resistance value changes with temperature. Refer to a temperature chart for expected values.
- At 20°C (68°F), the resistance should be approximately 12.58 kΩ.
- At 60°C (140°F), the resistance should be approximately 2.39 kΩ.
- If the sensor is open circuit (infinite resistance) or shorted (near zero resistance), it is faulty and needs replacement.
- Replace NTC Sensor: If the resistance values are incorrect, replace the NTC sensor.
- Check Main PCB: If the sensor tests fine, the issue might be with the main PCB, which may require checking or replacement.
E:07 or E7: Washing Motor Pump Error
Description: There is a problem with the main washing motor pump, which circulates water during the wash cycle. This error can occur if the motor is not running or its speed is not being detected correctly.
Potential Causes:
- A faulty wire harness connection to the motor pump or main PCB.
- The tachometer, which senses motor speed, is not providing a signal.
- A faulty motor capacitor (in some models).
- A defective washing motor pump itself.
- A faulty main electronic control board (PCB).
Solutions:
- Check Wiring: Inspect the wiring harness between the main PCB and the washing motor pump for any disconnections, damage, or loose terminals.
- Check the Capacitor: In dishwashers with an asynchronous washing motor, a faulty capacitor can prevent the motor from starting or running correctly. With power unplugged, and if you are familiar with testing capacitors, you can check its capacitance. A typical value is around 4 µF. Caution: Capacitors can store electrical charge even when unplugged. If you are not comfortable testing capacitors, do not attempt this step.
- Check the Tachometer: The tachometer generates a signal based on the motor’s rotation. With power unplugged, you can test the resistance of the tachometer. A typical ohmic value is around 0.154 KΩ. An open circuit or incorrect resistance indicates a faulty tachometer.
- Check the Motor Pump: With power unplugged, and if you are comfortable with electrical testing, you can check the resistance of the motor windings. For an asynchronous washing motor, a typical ohmic value is around 110 Ω. Incorrect resistance or an open circuit suggests a faulty motor.
- Replace Faulty Components: Replace the motor capacitor, tachometer, or the entire motor pump if they are found to be defective.
- Check Main PCB: If all other components check out, the main PCB may be the source of the error and require replacement.
E:08 or E8: Abnormal Heating Temperature Error
Description: The dishwasher is failing to heat the water to the required temperature within the expected time frame.
Potential Causes:
- Faulty wire harness with open circuits, loose connections, or leads off place in the heating circuit.
- A faulty pressure microswitch, which can prevent the heater from activating if it doesn’t detect sufficient water level.
- A defective heating element.
- A faulty pressure level switch, similar to the pressure microswitch, affecting water level detection for heating.
- A faulty main electronic control board (PCB).
Solutions:
- Check Wiring: Inspect the wiring harness between the main PCB, heating element, and pressure switches for any disconnections or damage.
- Check the Heating Element: With the power unplugged, test the resistance of the heating element using a multimeter. A typical ohmic value for the heater is around 8 to 9 Ω. An open circuit indicates a faulty heating element.
- Check the Pressure Switch(es): The pressure switch(es) confirm that there is enough water in the tub before the heater activates. With power unplugged, you can test the continuity of the pressure switch.
- With water in the tub, the switch should show continuity (around 0.1 – 1.0 Ω).
- With no water, the switch should be open-loop or show infinite resistance (∞ Ω).
- Ensure the hose connected to the pressure switch is not blocked or damaged.
- Replace Faulty Components: Replace the heating element, pressure microswitch, or pressure level switch if they are found to be defective.
- Check Main PCB: If the heating element and pressure switches are functioning correctly, the main PCB may be the issue.
E:09 or E9: Turbidity Sensor Error
Description: There is a problem with the turbidity sensor, which measures how dirty the water is. While the dishwasher may still complete a cycle, it won’t optimize the wash based on water clarity, potentially affecting efficiency. This error is often stored internally and may not always be displayed on the control panel but can be accessed in diagnostic modes.
Potential Causes:
- Faulty wire harness with open circuits, loose connections, or leads off place in the turbidity sensor circuit.
- Excessive food residues or debris on the turbidity sensor.
- Excessive foam in the dishwasher.
- A faulty turbidity sensor.
Solutions:
- Check Wiring: Inspect the wiring between the turbidity sensor and the main PCB for any disconnections or damage.
- Clean the Turbidity Sensor: Locate and clean the turbidity sensor, which is usually located at the bottom of the dishwasher tub. Ensure it is free of food particles and debris.
- Address Excessive Foam: Excessive foam can interfere with the sensor’s reading. Running a cold pre-wash cycle can help reduce foam. Use the correct amount and type of detergent for your dishwasher and water hardness.
- Replace Turbidity Sensor: If cleaning and addressing foam do not resolve the issue, the turbidity sensor may be faulty and require replacement.
E:10 or E10: Communication Failure (Main PCB and User Control)
Description: There is a loss of communication between the main electronic control board (PCB) and the user interface (U.I.) control panel.
Potential Causes:
- Faulty wire harness with open circuits, loose connections, or leads off place in the communication lines.
- A faulty user interface (U.I.) control panel.
- A faulty main electronic control board (PCB).
Solutions:
- Check Wiring: Inspect the wiring harness connecting the main PCB and the user interface for any disconnections or damage.
- Reprogramming (Authorized Service): In some cases, the main PCB may lose its programming, leading to a communication error. This typically requires specialized tools and knowledge and should only be performed by an authorized technical service.
- Replace User Interface (U.I.): If the wiring is intact and reprogramming doesn’t help, the user interface panel may be faulty and need replacement.
- Replace Main PCB: If none of the above steps resolve the communication error, the main PCB might be defective.
E:12 or E12: BLDC Washing Motor Error
Description: This error is specific to dishwashers equipped with a Brushless DC (BLDC) washing motor, which offers efficient performance. The error indicates a problem with the BLDC motor pump.
Potential Causes:
- Faulty wire harness connection to the BLDC motor pump or main PCB.
- A defective BLDC motor pump.
- A faulty main electronic control board (PCB).
Solutions:
- Check Wiring: Inspect the wiring harness between the main PCB and the BLDC motor for any disconnections or damage.
- Check Motor Windings: With the power unplugged, you can test the resistance between the windings of the BLDC motor using a multimeter. The resistance measurements between the three terminals (R, T, S) should be approximately the same, typically around 64.6 Ω. Significant differences or open circuits indicate a faulty motor.
- Replace Faulty Motor: If the motor winding resistances are incorrect, the BLDC motor pump is likely faulty and needs replacement.
- Check Main PCB: If the motor tests fine, the main PCB might be the source of the error.
E:14 or E14: Heating Chain Error
Description: This error indicates a problem within the heating circuit, involving multiple components responsible for heating the water.
Potential Causes:
- Faulty wire harness with open circuits, loose connections, or leads off place in the heating chain.
- A faulty pressure safety microswitch, which is part of the heating circuit’s safety mechanism.
- A faulty heater assembly (which includes the heating element and potentially other components).
- A faulty heater relay on the main PCB.
- A faulty main electronic control board (PCB).
Solutions:
- Check Wiring Harness: Inspect the wiring harness connectors and the wiring throughout the heating circuit for any disconnections, damage, or loose terminals.
- Check Pressure Safety Microswitch: Test the functionality and continuity of the pressure safety microswitch.
- Check NTC Probe: While E05 specifically addresses the NTC sensor, it’s an integral part of the heating chain. Verify its resistance as described in the E05 section.
- Check Heater Assembly: Inspect the heater assembly for any visible damage. You can also test the resistance of the heating element within the assembly as described in the E08 section.
- Check Heater Relay: The heater relay on the main PCB switches power to the heating element. A faulty relay can prevent heating. Replacing the relay or the main PCB is necessary if the relay is defective.
- Check Main PCB: If all individual components in the heating chain appear to be functioning correctly, the main PCB may be at fault.
E:15 or E15: EEPROM Error
Description: The dishwasher’s EEPROM (Electrically Erasable Programmable Read-Only Memory), which stores program data and settings, is not detected or is corrupted.
Solutions:
- Reprogramming (Authorized Service): The most common solution is to reprogram the core board (which contains the EEPROM). This requires specialized tools and knowledge and should only be performed by an authorized technical service.
- Replace Main PCB: If reprogramming is not successful or possible, the main PCB, which contains the EEPROM, will need to be replaced.
E:16 or E16: P.S.M. Shorted Error
Description: The Pressure Safety Microswitch (P.S.M.), a safety component in the heating circuit, is always detected as closed (shorted).
Potential Causes:
- A faulty wire harness causing a short circuit in the P.S.M. wiring.
- A faulty pressure microswitch that is stuck in the closed position.
- A faulty main electronic control board (PCB) incorrectly interpreting the switch’s state.
Solutions:
- Check Wiring Harness: Inspect the wiring harness connected to the pressure safety microswitch for any signs of damage or points where wires might be short-circuiting.
- Replace the Microswitch: If the wiring is intact, the pressure safety microswitch is likely faulty and needs to be replaced.
- Check Heater Relay/Main PCB: While the error specifically points to the microswitch, a faulty heater relay or the main PCB could potentially be involved in the detection of this error. If replacing the microswitch doesn’t resolve the issue, further investigation of the relay or PCB might be necessary.
E:17 or E17: Heater Relay Error
Description: There is an issue with the heater relay on the main PCB. This can prevent the heating element from receiving power. The description also mentions potential causes related to the safety microswitch and temperature probe, suggesting the system is detecting a problem with the heating activation circuit.
Potential Causes:
- The safety microswitch is intermittently opening and closing (“flickering”).
- The temperature probe (NTC sensor) is out of order (as per E05).
- The heater relay on the main PCB is stuck in the open position.
- A software issue in the main PCB’s initial cycles.
Solutions:
- Wait: The description suggests waiting at least 10 minutes as a first step, especially if the error occurs in the initial cycles, hinting at a possible temporary software glitch.
- Check Safety Microswitch and NTC: Verify the functionality of the pressure safety microswitch (as in E16) and the NTC temperature sensor (as in E05).
- Replace Main PCB: If the defect persists or recurs after waiting and checking the related components, it is highly likely that the main PCB, specifically the heater relay or its control logic, is faulty and needs to be replaced.
E:18 or E18: Water Level Error
Description: The dishwasher is detecting an incorrect water level during the filling phase. This could mean too much or too little water is being detected.
Potential Causes:
- A defective water inlet valve that is not closing properly or is allowing too much water in.
- A clogged air trap chamber, which is part of the pressure sensing system.
- A damaged pressure switch hose that is leaking air pressure.
- A faulty pressure level switch that is not accurately reporting the water level.
Solutions:
- Check the Solenoid Valve: Inspect the water inlet valve to ensure it is closing completely and not allowing water to seep in when it should be off. (See E02 for related checks).
- Clean the Air Trap Chamber: The air trap chamber is connected to the pressure switch. If it’s clogged, it can prevent accurate water level detection. Cleaning this chamber may resolve the issue. This might require some disassembly.
- Check Pressure Switch Hose: Examine the hose connecting the air trap chamber to the pressure level switch for any leaks or damage. Ensure it is securely connected.
- Replace the Pressure Level Switch: If the air trap and hose are clear and intact, the pressure level switch itself may be faulty and require replacement.
E:21 or E21: Flowmeter Error
Description: This error often indicates that the water inlet valve is stuck open, leading to continuous water filling or an inability to accurately measure the incoming water volume. It specifically points to an issue related to the flowmeter sensor, which measures the amount of water entering the dishwasher.
Potential Causes:
- A damaged water inlet valve that is constantly open.
- A faulty flow meter sensor, which may have a defective reed switch or impeller.
Solutions:
- Check the Water Inlet Valve: Verify that the water inlet valve is closing properly when the power is off. If it continues to allow water flow, it is faulty. (See E02 for related checks).
- Check the Reed Switch (within Flowmeter): The flowmeter typically contains a reed switch that is activated by a magnet on a spinning impeller as water flows through. With power unplugged, you might be able to test the continuity of the reed switch as the impeller is manually turned (if accessible and you are comfortable doing so). It should open and close as the magnet passes.
- Replace the Water Inlet Valve: If the valve is stuck open, it must be replaced.
- Replace the Flow Meter Sensor: If the water inlet valve is functioning correctly but the error persists, the flow meter sensor itself is likely faulty and needs replacement.
Conclusion
Candy dishwasher error codes serve as helpful indicators when your appliance encounters a problem. By understanding the meaning of each code and following the suggested troubleshooting steps, you can often identify and resolve common issues yourself.