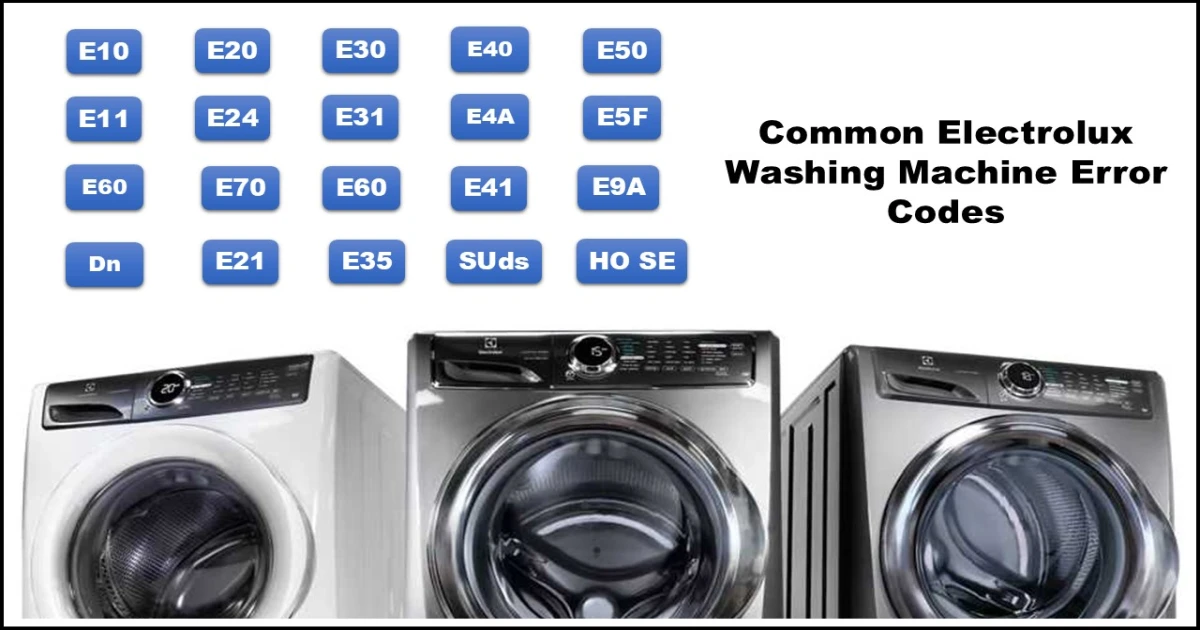
Uh Oh! Decoding Electrolux Washer Error Codes
Seeing an unfamiliar error code flash on your Electrolux washing machine can be stressful. Is it a simple fix or a major problem? Don’t panic! This guide will help you understand common Electrolux washer error codes. We’ll explain what they mean in plain English, suggest simple troubleshooting steps you can try yourself, and help you know when it’s time to call a professional technician. By understanding these codes, you can often resolve minor issues quickly, potentially saving you time and money on repair bills.
Safety First!
Before attempting any troubleshooting that involves checking components or connections:
- Turn off the washing machine using the power button.
- Unplug the appliance from the electrical outlet.
- Turn off the water supply valves connected to the machine.
Simple Checks to Try Before Diving into Codes:
Sometimes, the fix is surprisingly simple. Before matching your error code below, try these general checks:
- Power Cycle: Turn the machine off at the power button, unplug it for 5-10 minutes, plug it back in, and turn it on. This can reset minor glitches.
- Check Water Supply: Are both hot and cold water taps fully turned on? Are the hoses kinked or crushed?
- Check the Drain Hose: Is it properly positioned (not too low, causing siphoning, or too high)? Is it kinked or blocked?
- Clean the Drain Pump Filter: This is a common culprit for draining issues (usually located behind a small access panel at the bottom front of the machine). Check your manual for specific instructions.
- Check the Door: Is it firmly closed and latched? Is anything caught in the seal?
- Don’t Overload: Ensure you haven’t put too many items in the drum.
- Check Detergent: Are you using the correct type (HE – High Efficiency) and amount of detergent? Too much can cause issues (like SU dS).
If these basic checks don’t resolve the issue or you see a specific error code, find it in the sections below.
Electrolux Washer Error Codes Summary Table
| Error Code(s) | Meaning (Brief Description) |
|---|---|
| Water Fill & Level Issues | |
| E11 | Problem filling with water (Wash cycle) |
| E12 | Problem filling with water (Drying cycle) |
| E13 | Water leakage detected or level error |
| E31 | Pressure sensor (water level) error |
| E32 | Pressure sensor calibration error |
| E35 | Water overfill detected |
| E38 | Air trap clogged (water level not changing) |
| Draining Issues | |
| E21 | Problem draining water (Wash cycle) |
| E22 | Problem draining water (Drying cycle) |
| E23 | Drain pump power circuit (TRIAC) failure |
| E24 | Drain pump sensing circuit failure |
| E25 | Aqua Control (leak prevention) sensing failure |
| EF1 | Filter clogged warning (slow draining) |
| Door Lock Issues | |
| E41 | Door failed to lock |
| E42 | Door failed to unlock |
| E43 | Door lock power circuit (TRIAC) error |
| E44 | Door closed sensing circuit error |
| E45 | Door lock sensing circuit error |
| Motor & Inverter Issues | |
| E51 | Motor power circuit (TRIAC) short circuit |
| E52 | No motor speed signal (tachometer) |
| E53 | Motor power circuit (TRIAC) sensing error |
| E54 | Motor direction relay error / High voltage detected |
| E57 | Inverter current too high (trip) |
| E58 | Inverter phase current too high (overload) |
| E59 | Motor not responding / no speed signal detected |
| E5A | Inverter (heat sink) overheating |
| E5B / E5H | Inverter DC bus voltage too low |
| E5C | Inverter DC bus voltage too high |
| E5D | Inverter communication message error |
| E5E | Inverter <-> Main board communication failure |
| E5F | Inverter fault / configuration reset attempts fail |
| Heating Issues | |
| E61 | Water heating timeout / insufficient heating |
| E62 | Water overheating detected |
| E66 | Heating element relay failure |
| E68 | Current leakage to ground detected |
| E69 | Heating element circuit open / not detected |
| E6A | Heater relay sensing circuit error |
| Sensor (NTC – Temperature) Issues | |
| E71 | Wash temperature sensor (NTC) fault |
| E72 | Drying outlet temperature sensor (NTC) fault |
| E73 | Drying inlet temperature sensor (NTC) fault |
| E74 | Wash NTC wrong position / no temperature change |
| Recirculation Pump Issues (If equipped) | |
| E84 | Recirculation pump sensing circuit error |
| E85 | Recirculation pump power circuit (TRIAC) error |
| Control, UI & Communication Issues | |
| E83 | Program selector reading not supported |
| E86 | Program selector configuration error |
| E87 | User Interface (UI) microcontroller fault |
| E91 | Communication problem (UI <-> Main board) |
| E92 | Communication protocol mismatch (UI <-> Main) |
| E93 | Incorrect appliance configuration |
| E94 | Incorrect cycle configuration |
| E97 | Mismatch between selector and cycle config |
| E98 | Communication mismatch (Main <-> Inverter) |
| E9C | User Interface (UI) configuration fault |
| E9E | Touch screen fault (if equipped) |
| EH1 / EB1 | Power supply frequency out of limits |
| EH2 / EB2 | Power supply voltage too high |
| EH3 / EB3 | Power supply voltage too low |
| EHE / EBE | Safety relay failure (Main / Inverter board) |
| EHF / EBF | Safety relay sensing circuit failure |
| Warnings & Operational Codes | |
| EF2 | Excessive foam detected warning |
| EF5 | Unbalanced load warning (final spin skipped) |
| EF6 | Safety reset activated / Protection check fail |
| HO SE | Inlet hoses reversed (Hot/Cold swapped) |
| SU dS | Excessive suds detected / Suds lock |
Note: This table provides a brief summary. Refer to the detailed descriptions below for potential causes and troubleshooting steps.
Common Electrolux Washer Error Codes Explained
We’ve grouped codes by the type of problem they usually indicate:
Group 1: Water Filling & Level Errors (E11, E12, E13, E31, E32, E35, E38)
These codes typically relate to problems getting water into the machine, detecting the water level, or potential leaks.
- E11: Problem Filling with Water (Wash Cycle)
- Meaning: The machine isn’t filling with enough water within the expected time during the wash phase.
- Related: E12 (Problem Filling during Drying Cycle)
- E13: Water Leak Detected or Not Enough Water
- Meaning: The machine suspects a leak OR isn’t sensing the correct water level after filling.
- E31: Pressure Sensor/Switch Error
- Meaning: The sensor that measures water level is sending an incorrect signal.
- Related: E32 (Pressure Sensor Calibration Error at start), E35 (Water Overfill Detected), E38 (Air Trap Clogged – water level not changing)
Possible Causes (Water Filling/Level Errors):
- Water taps turned off or low water pressure.
- Kinked or blocked inlet hoses.
- Clogged filter screens inside the inlet hose connections or water valve.
- Incorrect drain hose position causing water to siphon out.
- Leak in the machine or hoses.
- Blocked air trap or pressure sensor hose (prevents correct level sensing).
- Faulty water inlet valve(s).
- Faulty pressure sensor/switch.
- Wiring issues.
- Faulty main control board.
What You Can Try (Water Filling/Level Errors):
- Check Water Supply: Ensure taps are fully open and hoses aren’t kinked.
- Check Drain Hose: Verify correct height and no blockages.
- Clean Inlet Filters: Turn off water, disconnect hoses from the machine, and check for small filter screens inside the connection points. Clean gently if clogged.
- Check for Leaks: Inspect hoses and connections.
- Clean Air Trap: (More advanced) Locate the air trap (a small plastic chamber connected to the tub via a thin hose, leading to the pressure sensor) and ensure it and the hose are clear of debris or goo.
- Power Cycle: Turn off, unplug for 10 mins, plug back in, try again.
- Clear Error History: (See Test Mode section below – use with caution).
When to Call a Pro: If simple checks fail, or if you suspect faulty valves, sensors, wiring, or the control board.
Group 2: Draining Errors (E21, E22, E23, E24, E25, EF1)
These codes mean the machine is having trouble pumping water out.
- E21: Problem Draining Water (Wash Cycle)
- Meaning: Water isn’t draining out quickly enough during the wash cycle.
- Related: E22 (Problem Draining during Drying Cycle)
- E23: Drain Pump Power Issue (TRIAC Failure)
- Meaning: The electronic component controlling the drain pump has failed.
- Related: E24 (Drain Pump Sensing Issue)
- E25: Aqua Control Sensing Failure (If equipped – relates to leak prevention system)
- EF1: Filter Clogged Warning
- Meaning: Draining is slow, strongly suggesting a blocked drain filter.
Possible Causes (Draining Errors):
- Clogged Drain Pump Filter: Most common cause! Coins, lint, small items block it.
- Blocked or kinked drain hose.
- Obstruction inside the drain pump itself.
- Faulty drain pump (motor failure).
- Wiring issues to the pump.
- Faulty pressure sensor (not sensing ’empty’).
- Faulty main control board.
What You Can Try (Draining Errors):
- Clean the Drain Pump Filter: This is the #1 fix. Locate the access panel (usually bottom front), place a shallow tray and towel underneath, unscrew the cap carefully (water will spill out), clear any debris, and screw it back securely.
- Check Drain Hose: Ensure it’s not kinked, crushed, or blocked. Check where it enters your home’s drain pipe for obstructions.
- Power Cycle: Turn off, unplug for 10 mins, plug back in, try a ‘drain’ or ‘spin’ cycle.
- Clear Error History: (See Test Mode section below – use with caution).
When to Call a Pro: If the filter and hose are clear but it still won’t drain, or if you suspect the pump motor, wiring, or control board (especially E23/E24 errors).
Group 3: Door Lock Errors (E41, E42, E43, E44, E45)
These codes relate to the door locking mechanism. The machine won’t start if the door isn’t properly closed and locked.
- E41: Door Not Locking
- Meaning: The machine tried to lock the door but couldn’t confirm it locked within the time limit.
- E42: Door Won’t Unlock
- Meaning: The cycle finished, but the door lock mechanism isn’t releasing.
- E43: Door Lock Power Issue (TRIAC Error)
- Meaning: Problem with the electronic component controlling the door lock.
- Related: E44 (Door Closed Sensor Issue), E45 (Door Lock Sensing Issue)
Possible Causes (Door Lock Errors):
- Door not fully closed or obstructed (clothing caught).
- Faulty door latch or strike.
- Faulty door lock assembly (the mechanism itself).
- Wiring issues between the lock and control board.
- Faulty main control board.
- (Rarely) An issue with the heating element causing electrical interference.
What You Can Try (Door Lock Errors):
- Check Door: Open and close it firmly. Ensure nothing is blocking the latch or caught in the seal.
- Power Cycle: Turn off, unplug for 10 mins, plug back in. This might reset the lock if it’s temporarily stuck (especially for E42).
- Check Latch/Strike: Visually inspect for damage or misalignment.
- Clear Error History: (See Test Mode section below – use with caution).
When to Call a Pro: If the door physically won’t close/latch, won’t unlock after a power cycle and waiting period, or if error codes persist, suggesting faulty components or wiring.
Group 4: Motor & Inverter Errors (E51-E5F)
These codes point to issues with the main drive motor or the inverter board that controls its speed and direction. These are often more complex problems.
- E51: Motor Power Issue (TRIAC Short Circuit)
- E52: No Signal from Motor Speed Sensor (Tachometer)
- E53/E54: Motor Control Sensing Errors
- E57/E58: Inverter Current Too High (Possible short or overload)
- E59: Motor Not Starting/Responding (No speed signal)
- E5A: Inverter Overheating
- E5B/E5H: Inverter Voltage Too Low
- E5C: Inverter Voltage Too High
- E5D/E5E/E5F: Communication Problem (Inverter to Main Board) or Fault
Possible Causes (Motor/Inverter Errors):
- Loose or damaged wiring between motor, inverter, and main board.
- Faulty motor tachometer (speed sensor).
- Faulty drive motor.
- Faulty inverter board.
- Faulty main control board.
- Overloaded machine causing strain.
- Power supply voltage fluctuations (for E5B, E5C).
What You Can Try (Motor/Inverter Errors):
- Power Cycle: Turn off, unplug for 10 mins, plug back in.
- Check Load: Ensure the machine isn’t severely overloaded. Try with a smaller load.
- Check Connections (Visually, if comfortable): With power OFF and UNPLUGGED, if you can access the rear/bottom, look for obviously loose or burnt wire connectors on the motor and control boards. Do not touch components unless you are qualified.
- Let it Cool: If E5A (Overheating) occurs, let the machine cool down for 30 mins before trying again. Check ventilation around the machine.
- Check Voltage: If E5B/E5C occurs repeatedly, consider if your home’s voltage might be unstable.
When to Call a Pro: Motor and inverter errors (E5x codes) almost always require professional diagnosis and repair due to the complexity and potential cost of parts.
Group 5: Heating Errors (E61, E62, E66, E68, E69, E6A)
These codes indicate problems with the water heating system.
- E61: Water Not Heating Correctly/Timeout
- E62: Water Overheating (Above 88°C)
- E66: Heating Element Relay Failure
- E68: Ground Leakage Detected (Often via heater)
- E69: Heating Element Circuit Open (Not detected)
- E6A: Heater Relay Sensing Error
Possible Causes (Heating Errors):
- Faulty heating element (burnt out or shorted).
- Faulty temperature sensor (NTC).
- Wiring issues to heater or sensor.
- Faulty heater relay on the main control board.
- Faulty main control board.
What You Can Try (Heating Errors):
- Power Cycle: Turn off, unplug for 10 mins, plug back in.
- Check Connections (Visually): With power OFF and UNPLUGGED, check for loose/burnt wires near the heating element (usually at the bottom of the tub) and temperature sensor.
- Clear Error History: (See Test Mode section below – use with caution).
When to Call a Pro: Heating element issues require testing with a multimeter and usually part replacement. Call a technician.
Group 6: Sensor (NTC) Errors (E71, E72, E73, E74)
These codes relate to the temperature sensors (NTCs) used for water and drying.
- E71: Wash Temperature Sensor (NTC) Fault (Open/Short)
- E72: Drying Outlet Temperature Sensor (NTC) Fault
- E73: Drying Inlet Temperature Sensor (NTC) Fault
- E74: Wash Temperature Sensor (NTC) Wrong Position/Not Reading Temp Change
Possible Causes (Sensor Errors):
- Faulty NTC sensor itself.
- Damaged wiring to the sensor.
- Poor connection at the sensor or control board.
- (E74 specific) Sensor dislodged or heavy scale buildup preventing accurate reading.
- Faulty main control board.
What You Can Try (Sensor Errors):
- Power Cycle: Turn off, unplug for 10 mins, plug back in.
- Check Connections (Visually): With power OFF and UNPLUGGED, locate the sensor(s) and check for secure wiring connections.
- Clean Sensor (Wash NTC – E71/E74): If accessible, the water temperature sensor might be removable. Check for limescale buildup and clean gently if needed (consult manual).
- Clear Error History: (See Test Mode section below – use with caution).
When to Call a Pro: Persistent NTC errors usually mean the sensor or wiring needs professional testing and likely replacement.
Group 7: Recirculation Pump Errors (E84, E85)
Some models have a pump to recirculate water during the wash.
- E84/E85: Recirculation Pump Electrical/Sensing Fault
Possible Causes:
- Faulty recirculation pump.
- Wiring issues.
- Faulty main control board.
What You Can Try:
- Power Cycle.
- Check Connections (Visually).
When to Call a Pro: These usually require professional diagnosis.
Group 8: Control/UI & Communication Errors (E83, E86, E87, E91-E9E, EH1-EHF)
These codes indicate problems with the control boards, user interface (display/buttons), program selector, or communication between them.
- E83/E86/E97: Program Selector/Configuration Issue
- E87: User Interface Microcontroller Fault
- E91/E92/E98: Communication Error (UI <-> Main Board or Main <-> Inverter)
- E93/E94/E9C: Incorrect Configuration Data
- E9E: Touch Screen Fault (If applicable)
- EH1/EB1: Power Frequency Out of Range
- EH2/EB2: Power Voltage Too High
- EH3/EB3: Power Voltage Too Low
- EHE/EBE/EHF/EBF: Power Relay/Sensing Failure on Main Board/Inverter
Possible Causes (Control/Communication Errors):
- Loose or damaged wiring between boards.
- Faulty user interface board.
- Faulty main control board.
- Faulty inverter board (for E98, EHE/EBE, EHF/EBF).
- Corrupted configuration data.
- Unstable mains power supply (for EH1/EH2/EH3).
What You Can Try (Control/Communication Errors):
- Power Cycle: This is the most important step here. Turn off, unplug for 10-15 minutes to allow all components to discharge and reset, then plug back in.
- Check Connections (Visually): With power OFF and UNPLUGGED, check ribbon cables and connectors between the main board and the user interface/display panel for secure seating.
- Check Power Supply: Persistent EH/EB errors might indicate issues with your home’s electricity.
- Clear Error History: (See Test Mode section below – use with caution).
When to Call a Pro: These errors, especially if persistent after a power cycle, usually point to a faulty electronic board or connection issue requiring a technician.
Group 9: Warnings & Operational Codes (EF2, EF5, EF6, HO SE, SU dS)
These aren’t always critical errors but indicate specific conditions.
- EF2: Too Much Foam Detected
- Cause: Usually too much or the wrong type of detergent.
- Action: Let the machine run; it will perform extra rinses. Use less/correct HE detergent next time.
- EF5: Unbalanced Load Detected
- Cause: Load shifted during spin, machine couldn’t balance it.
- Action: Redistribute the load manually, try a ‘Drain & Spin’ cycle. Avoid washing single heavy items.
- EF6: Safety Reset Activated (Generic fault indicator)
- HO SE: Hoses Reversed
- Cause: Hot water hose connected to cold inlet and vice-versa.
- Action: Turn off water taps, swap hoses to correct inlets, press Cancel/Start.
- SU dS (or similar): Suds Lock / Oversudsing
- Cause: Excessive suds, usually from too much/wrong detergent or very soft water. Can also indicate a blockage in the pressure system’s air trap or sump hose.
- Action: Press Cancel/Start. The machine will try to rinse away suds. If persistent, check detergent usage. If it keeps happening, clean the air trap/sump hose (see E1x/E3x errors).
Advanced: Electrolux Washing Machine Test Mode (Use with Caution!)
Your machine likely has a diagnostic or test mode. This allows technicians (or knowledgeable homeowners) to check specific components. Entering and using this mode incorrectly could potentially cause issues or reset settings. Proceed only if you feel comfortable. The exact method may vary slightly by model – consult your service manual if unsure.
Common Method to Enter Test Mode:
- Turn the machine ON. Select a common cycle like ‘Normal’ or ‘Cotton’. Press Start/Pause.
- Press the Power button to turn the machine OFF. Wait a few seconds.
- Press the Power button to turn it ON again.
- Immediately (within ~7 seconds), press and HOLD the
TempandSet/Selectbuttons (or similar function buttons often located near Temp) simultaneously for about 3 seconds. - Success is usually indicated by flashing LEDs or a code on the display.
Navigating Tests:
- Typically, you rotate the main cycle selector knob clockwise to step through different tests (O1, O2, O3…).
- The display or LEDs will indicate the test number.
- Common Tests (Examples – may vary):
OO: Display checkO1–O4,10: Test specific water valves (hot, cold, prewash, bleach)O5: Door lock/unlock and drum light checkO6: Heater and motor checkO7: Recirculation pump check (if equipped)O9: Drain pump check11: Error History Display – Shows previously logged error codes.
Clearing Error History (Often done in Test Mode):
- While viewing the error history (often test
11), press and HOLD the same button combination used to enter test mode (Temp+Set/Select) for about 3 seconds until the display confirms cleared (e.g., showsE00). Clearing codes can be helpful for troubleshooting but erases valuable diagnostic information for a technician.
Exiting Test Mode:
- Method 1: Press the Power button to turn the washer OFF.
- Method 2: Unplug the washer.
When Should You Definitely Call a Professional Technician?
While some errors are simple fixes, call a qualified appliance repair technician if:
- You’ve tried the simple checks and power cycle, but the error persists.
- The error code points to internal components like the motor, inverter, control boards, heating element, or sensors (E4x, E5x, E6x, E7x, E8x, E9x, EHx/EBx codes often require this).
- You see signs of electrical issues (burning smell, sparks, repeatedly tripped breakers).
- Water is leaking from the machine body itself (not just hoses).
- You are uncomfortable performing any of the checks or accessing internal parts.
- The machine is making loud grinding, banging, or unusual noises.
Conclusion: Keep Your Washer Running Smoothly
Understanding Electrolux Washer Error Codes empowers you to handle minor glitches and communicate effectively if you need professional help. Remember to perform basic checks first and always prioritize safety by unplugging the machine before inspection. Regular maintenance, like cleaning the drain filter periodically and using the correct detergent, can prevent many common errors.