This guide will help you identify common Midea front load washing machine error codes, understand their potential causes, and walk you through troubleshooting steps you can often perform yourself.
IMPORTANT SAFETY NOTICE: Always unplug your washing machine from the electrical outlet before attempting any inspection, cleaning, or repair. Working on an appliance connected to power can lead to serious injury or electrical shock.
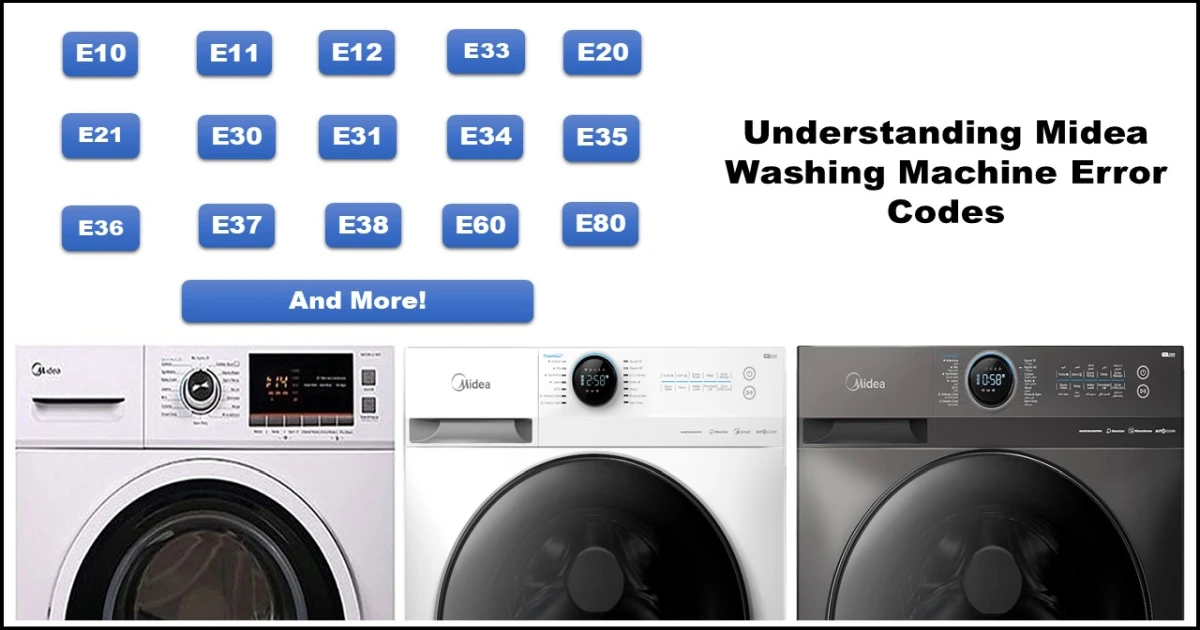
Midea front load Washing Machine Error Codes & Solutions
Find your error code below to learn what it means and how to potentially fix it.
E10: Water Inlet Error
- Meaning: The machine is having trouble filling with water within the expected timeframe.
- Possible Causes:
- Water supply tap is closed or not fully open.
- Water inlet hose is kinked or blocked.
- Water inlet valve filter is clogged.
- Faulty water inlet valve.
- Wiring issue between the valve and the main control board (PCB).
- Problem with the water level sensor or main PCB.
- Troubleshooting Steps:
- Ensure Water Supply: Check that the water tap connected to the washer is fully open and that there’s adequate water pressure.
- Inspect Hose: Make sure the inlet hose isn’t bent, kinked, or crushed.
- Clean Filter: Turn off the water tap. Carefully disconnect the inlet hose from the back of the machine. Check the small filter screen inside the inlet valve port for debris and clean it gently if necessary. Reconnect the hose securely.
- Check Wiring: Inspect the wire connections to the inlet valve for damage or looseness.
- Component Check (Advanced): If the issue persists, the inlet valve, water level sensor, or main PCB might need testing or replacement (often requires a multimeter and technical knowledge).
- Technical Info: Inlet Valve (Resistance varies by model/voltage), Water Level Sensor (Check documentation if testing).
E11, E12, E33: Water Level Errors
- Codes:
- E11: Water overflow detected.
- E12: Water level exceeded the maximum allowed.
- E33: Water level sensor (pressure switch) fault.
- Meaning: Too much water is entering the machine, or the sensor that detects the water level isn’t working correctly.
- Possible Causes:
- Water inlet valve stuck open (water enters even when the machine is off).
- Blockage in the air chamber or pressure hose connected to the water level sensor.
- Faulty water level sensor.
- Faulty main PCB.
- Troubleshooting Steps:
- Check Continuous Filling: If water enters the drum even when the machine is powered off, the water inlet valve likely needs replacement. Turn off the water tap immediately.
- Inspect Pressure System: Check the thin rubber or plastic hose running from the bottom of the tub area up to the pressure sensor. Ensure it’s securely connected at both ends and not kinked, split, or blocked. Check if the air chamber (where the hose connects at the bottom) is clear.
- Component Check (Advanced): The water level sensor or main PCB may need testing or replacement.
- Technical Info (Example): Water Level Sensor – Capacitance between pins 1&2 / 2&3 ≈ 45 nF; Ohmic Value between 1&3 ≈ 25 Ω (Values can vary by model).
E20, E21: Drainage Errors
- Codes:
- E20: Drain pump circuit error.
- E21: Water not draining within the expected timeframe.
- Meaning: The machine is unable to pump out the water effectively.
- Possible Causes:
- Drain pump filter is clogged with debris (lint, coins, etc.).
- Drain hose is kinked, blocked, or positioned too high/low.
- Blockage inside the machine leading to the pump.
- Faulty drain pump.
- Wiring issue to the drain pump.
- Faulty main PCB.
- Troubleshooting Steps:
- Clean Pump Filter: Locate the small access panel, usually at the bottom front of the machine. Place a shallow tray and towel underneath. Carefully unscrew the filter cap (some water will drain out). Clear any debris from the filter and the housing. Screw the cap back on securely.
- Check Drain Hose: Ensure the drain hose isn’t kinked, crushed, or blocked. Check that the end of the hose meets installation height requirements (consult your manual, usually between 60-100cm from the floor).
- Component Check (Advanced): The drain pump motor or main PCB might need testing or replacement.
- Technical Info (Example): Drain Pump – Resistance ≈ 30 Ω (110V) / 180 Ω (220V) (Values vary).
E30: Door Lock Error
- Meaning: The machine cannot detect that the door is properly closed and locked.
- Possible Causes:
- Door is not fully closed or latched.
- Obstruction preventing the door from closing.
- Faulty door lock mechanism.
- Wiring issue between the door lock and the main PCB.
- Faulty main PCB.
- Troubleshooting Steps:
- Check Door: Open the door fully and close it firmly. Listen for a click. Ensure no clothing is caught in the seal. Check if the latch hook on the door aligns correctly with the lock mechanism.
- Inspect Lock: Visually inspect the door lock mechanism for any obvious damage.
- Component Check (Advanced): The door lock assembly or main PCB may need testing or replacement.
- Technical Info (Example): Door Lock – Resistance between 40 Ω to 190 Ω (Varies significantly by type/model).
E34, E35: NTC (Temperature Sensor) Error – Wash
- Codes:
- E34: Wash NTC sensor circuit is open.
- E35: Wash NTC sensor circuit is shorted.
- Meaning: Problem with the sensor that measures the water temperature during the wash cycle.
- Possible Causes:
- Loose or damaged wiring between the NTC sensor and the main PCB.
- Faulty NTC sensor.
- Faulty main PCB.
- Troubleshooting Steps:
- Check Wiring: Inspect the wiring connected to the temperature sensor (usually located near or inserted into the heating element).
- Component Check (Advanced): The NTC sensor or main PCB may need testing (resistance check) or replacement.
- Technical Info (Example): Wash NTC Sensor – Resistance ≈ 4.6 kΩ at 25°C/77°F (Resistance changes with temperature).
E36: Heating Element Error
- Meaning: Problem with the main water heating element.
- Possible Causes:
- Loose or damaged wiring between the heating element and the main PCB.
- Faulty heating element (burnt out).
- Faulty main PCB.
- Troubleshooting Steps:
- Check Wiring: Inspect the wiring connected to the heating element terminals.
- Component Check (Advanced): The heating element or main PCB may need testing (resistance check) or replacement.
- Technical Info (Example): Heater Assembly – Resistance ≈ 16 Ω (110V) / 30 Ω (220V) (Commonly 25-35 Ω for 220-240V models). Note: The original 300 Ω seems unusually high for a main heater, typical values are lower.
E37, E38, E3A: Drying System Errors (Washer-Dryer Models)
- Codes:
- E37: Drying-out NTC sensor error (measures air temp leaving drum).
- E38: Drying-in NTC sensor error (measures air temp entering drum).
- E3A: Drying heater assembly error.
- Meaning: Fault within the drying components of a washer-dryer.
- Possible Causes:
- Wiring issues to the respective drying NTC sensor or drying heater.
- Faulty drying NTC sensor(s).
- Tripped thermal cutout/high limit on the drying heater (may be resettable manually).
- Faulty drying heater element.
- Faulty drying fan motor or capacitor.
- Faulty main PCB.
- Troubleshooting Steps:
- Check Wiring: Inspect connections to the drying sensors, heater, and fan.
- Reset Thermal Cutout: Locate the drying heater assembly and check for a small reset button on the thermal cutout/high limit thermostat. Press it if present.
- Component Check (Advanced): Requires testing resistances of sensors, heater, fan windings, and fan capacitor value, or replacement of faulty parts/PCB.
- Technical Info (Examples):
- Drying-out NTC: ≈ 1.7 kΩ @ 50°C/122°F
- Drying-in NTC: ≈ 0.45 kΩ @ 90°C/194°F
- Drying Heater: ≈ 18 Ω (110V) / 30 Ω (220V)
- Drying Fan Motor: Check C-R and C-S windings (e.g., 80 Ω / 90 Ω)
- Drying Fan Capacitor: ≈ 2.8 µF
- Technical Info (Examples):
E40: EEPROM Error
- Meaning: Error with the memory chip on the main control board.
- Possible Causes:
- Data corruption on the EEPROM chip.
- Faulty main PCB.
- Troubleshooting Steps:
- Power Cycle: Turn the washer off at the mains, wait a minute, then turn it back on. Sometimes this can resolve temporary glitches.
- Replace PCB: This error usually requires replacing the main control board (PCB).
E50-E5E, E64: Motor & Inverter Errors (BLDC Motors)
- Codes: E50, E52, E53, E55, E56, E57, E58, E5A, E5B, E5C, E5D, E5E, E64 (various specific motor/inverter faults like overload, temperature, signal loss, connection loss, voltage issues, IGBT failure).
- Meaning: Problem with the main drive motor (Brushless DC type) or the inverter board that controls it.
- Possible Causes:
- Loose or damaged wiring between the motor, inverter board, and main PCB.
- Faulty BLDC motor.
- Faulty inverter board.
- Faulty main PCB.
- Troubleshooting Steps:
- Check Connections: Inspect all wiring connections between the main PCB, the inverter board (if separate), and the motor itself. Ensure they are secure and undamaged.
- Component Check (Advanced): Requires testing motor windings, the inverter board, and potentially the main PCB. Replacement of the faulty component is typically needed.
- Technical Info (Example): BLDC Motor – Resistance between any two phases (U-V, V-W, W-U) ≈ 5 Ω.
E60, E61, E62: Motor Errors (Universal Motors)
- Codes:
- E60: Universal motor circuit error.
- E61: Abnormal motor speed signal (tachometer error).
- E62: Motor control TRIAC error (on main PCB).
- Meaning: Problem with the main drive motor (Universal type – uses carbon brushes) or its control circuit.
- Possible Causes:
- Worn out carbon brushes on the motor.
- Loose or damaged wiring between the motor and main PCB.
- Faulty tachometer (speed sensor) on the motor.
- Blown motor fuse (if present).
- Faulty motor windings.
- Faulty motor control TRIAC on the main PCB.
- Faulty main PCB.
- Troubleshooting Steps:
- Check Wiring: Inspect connections between the motor and the main PCB.
- Inspect Carbon Brushes: Check the length of the carbon brushes (if accessible). If they are very short (e.g., less than 1-1.5 cm), they likely need replacing.
- Component Check (Advanced): Requires testing the tachometer, motor windings, and potentially the main PCB (specifically the motor control TRIAC).
E70: Shorted Button Error
- Meaning: The control system detects that one or more buttons on the control panel are stuck or continuously pressed.
- Possible Causes:
- Stuck button due to physical obstruction or residue.
- Moisture or contamination on the user interface board.
- Faulty user interface board.
- Faulty main PCB.
- Troubleshooting Steps:
- Power Cycle: Turn the machine off and on again.
- Check Buttons: Ensure no buttons are physically stuck. Gently press each button to ensure it moves freely.
- Clean Panel (Carefully): If suspected contamination, unplug the machine and carefully clean the control panel area with a slightly damp cloth or electronics-safe cleaner if necessary (avoid excess moisture). Allow it to dry completely.
- Replace Boards (Advanced): If the error persists, the user interface board or main PCB may need replacement.
E80, E81: Communication Error
- Meaning: Failure in communication between the main control board (PCB) and the user interface (display) board.
- Possible Causes:
- Loose or damaged ribbon cable or wiring connecting the two boards.
- Faulty user interface board.
- Faulty main PCB.
- Troubleshooting Steps:
- Check Connection: Carefully inspect the wiring harness or ribbon cable connecting the main PCB to the user interface board. Ensure it’s securely plugged in at both ends and shows no signs of damage.
- Replace Boards (Advanced): If the connection is good, either the user interface board or the main PCB likely needs replacement.
When to Call a Professional
While this guide covers common issues, some problems require professional expertise:
- If you’re uncomfortable performing any of the steps.
- If you suspect internal wiring damage.
- If multiple components seem faulty.
- If troubleshooting doesn’t resolve the error code.
- For complex issues involving the motor, inverter, or main control board replacement.
Contact MIDEA customer support or a qualified local appliance repair service for assistance.
Conclusion:
Midea washing machine error codes are valuable tools for diagnosing problems. By understanding what they mean and carefully following the safety precautions and troubleshooting steps outlined here, you can often identify and fix common issues yourself.