LG Refrigerator Error Codes: A Comprehensive Troubleshooting Guide
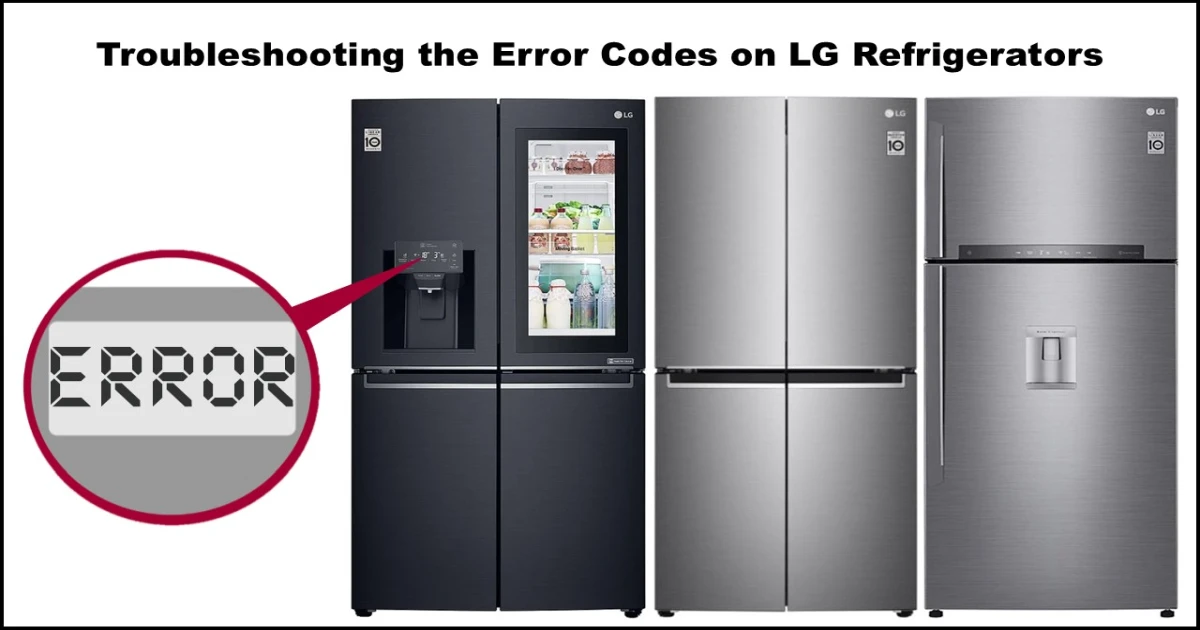
Facing an error code on your LG refrigerator display can be frustrating. These codes are designed to help you or a technician identify specific issues within the appliance’s complex systems. While some require professional attention, others can be diagnosed and potentially fixed with basic troubleshooting steps.
This guide explains common LG refrigerator error codes, their potential causes, and suggested solutions.
Important Safety Information:
- Always unplug your refrigerator from the power outlet before performing any checks, inspections, or repairs.
- Working with electrical components can be dangerous. If you are not comfortable or experienced with appliance repair, it’s best to contact a qualified technician.
- Troubleshooting steps involving voltage or resistance checks require a multimeter and basic electrical knowledge. Proceed with caution.
General First Step: Power Cycle
For many electronic glitches, a simple power cycle can resolve temporary LG refrigerator error codes.
- Unplug the refrigerator from the wall outlet.
- Wait 5-10 minutes.
- Plug the refrigerator back in.
- Check if the error code is gone. If it reappears, proceed with the specific troubleshooting for that code below.
Understanding Specific LG Refrigerator Error Codes:
Here is a breakdown of common LG refrigerator error codes:
E AS: Auto Door Switch Error
- Meaning: This code indicates a problem with the operation of the automatic door Reed switch. This switch detects the position of the auto door.
- Related Error Codes:
L AS: Left auto drawer switch error.I LS: Smart auto drawer switch error.r AS: Right auto drawer switch error.
- Potential Causes:
- Faulty auto door switch (Reed switch).
- Damaged or disconnected wire harness connector between the switch and the main board.
- Faulty main control board.
- Troubleshooting Steps:
- Power Cycle: Try the general power cycle first.
- Inspect Wiring: Unplug the refrigerator. Check the wire harness connections between the auto door switch assembly and the main control board for looseness or damage.
- Test the Switch: (Requires multimeter and magnet) Unplug the refrigerator. Test the auto door Reed switch for proper operation using a multimeter and a magnet as per your service manual’s instructions. Replace the switch if it’s faulty.
- Main Board: If the switch and wiring check out, the issue might be with the main control board. Testing or replacing the main board is typically recommended for a qualified technician.
E CO: Communication Failure
- Meaning: This error signifies a loss of communication between the main control board (the brain of the refrigerator) and the user interface board (the display panel you interact with).
- Potential Causes:
- Loose or disconnected wiring at either the main board, the user interface board, or within the door hinge harness (where wires often pass).
- Damaged wire harness.
- Faulty user interface board.
- Faulty main control board.
- Troubleshooting Steps:
- Power Cycle: Start with a power cycle.
- Check Connections: Unplug the refrigerator. Inspect all wire connections at both the main control board and the user interface display board. Also, check the wiring harness that passes through the door hinge area for any damage or disconnection.
- Inspect Harness: Check the entire wire harness running between the user interface and the main board for cuts, pinches, or disconnections.
- Test User Interface Board: If connections and harness are good, the user interface board may be faulty. Replacing it is a potential solution.
- Test Main Board: If replacing the user interface board doesn’t resolve the issue, the problem could be the main control board. This requires further testing or replacement, often by a professional.
E C1: Dispenser Communication Error
- Meaning: This code indicates a problem with the communication specifically between the water/ice dispenser components (often a dispenser board) and the user interface board.
- Potential Causes:
- Damaged or disconnected wire harness connections.
- Faulty dispenser control board (if applicable).
- Faulty user interface board.
- Troubleshooting Steps:
- Power Cycle: Begin with a power cycle.
- Check Connections: Unplug the refrigerator. Inspect the wire connections at the dispenser area (behind the control panel or kick plate) and at the user interface board for looseness or damage.
- Inspect Harness: Check the wire harness running between the dispenser components and the user interface board for any damage.
- Test Dispenser Board: If your model has a separate dispenser board, it may be faulty and require replacement.
- Test User Interface Board: If the dispenser board and harness are okay, the user interface board itself might be the issue and need replacement.
E CF: Condenser Fan Error
- Meaning: This error indicates a problem with the condenser fan motor, located near the compressor at the bottom rear of the refrigerator. This fan is crucial for cooling the condenser coils, which dissipates heat from the refrigerant. A failure can lead to inefficient cooling and increased compressor run time.
- Potential Causes:
- Faulty wire harness connection to the condenser fan.
- Obstruction preventing the fan blade from spinning freely.
- Faulty condenser fan motor.
- Faulty main control board.
- Troubleshooting Steps:
- Power Cycle: Start with a power cycle.
- Inspect Wiring: Unplug the refrigerator. Check the wire harness connector at the condenser fan motor and trace it back to the main board, checking connections there as well.
- Check for Obstructions: Unplug the refrigerator. Carefully check if the condenser fan blade can rotate freely. Remove any dust buildup, debris, or obstacles preventing its movement.
- Test Fan Motor: (Requires multimeter) Unplug the refrigerator. Test the condenser fan motor itself for resistance or voltage supply as per your service manual. Refer to the technical specifications section below for typical voltage test points.
- Main Board: If the wiring, fan motor, and rotation are okay, the main control board might be the issue.
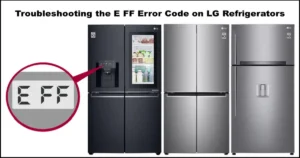
E FF: Freezer Fan Error
- Meaning: This code indicates a problem with the freezer cabinet fan motor. This fan circulates cold air within the freezer compartment.
- Potential Causes:
- Faulty wire harness connection to the freezer fan.
- Ice or other obstruction preventing the fan blade from spinning freely.
- Faulty freezer fan motor.
- Faulty main control board.
- Troubleshooting Steps:
- Power Cycle: Start with a power cycle.
- Inspect Wiring: Unplug the refrigerator. Check the wire harness connector at the freezer fan motor and trace it back to the main board, checking connections.
- Check for Obstructions/Ice: Unplug the refrigerator. Inspect the freezer fan blade for obstructions, especially ice buildup. If ice is present, you’ll need to manually defrost the freezer (unplug the unit and leave the doors open, with towels to catch water) before the fan can spin freely.
- Test Fan Motor: (Requires multimeter) Unplug the refrigerator. Test the freezer fan motor for resistance or voltage supply. Refer to the technical specifications section below for typical voltage test points.
- Main Board: If the wiring, fan motor, and rotation are okay, the main control board might be the issue.
E rF: Refrigerator Fan Error
- Meaning: This error indicates a problem with the refrigerator cabinet fan motor. This fan circulates cold air within the fresh food compartment.
- Potential Causes:
- Faulty wire harness connection to the refrigerator fan.
- Obstruction preventing the fan blade from spinning freely.
- Faulty refrigerator fan motor.
- Faulty main control board.
- Troubleshooting Steps:
- Power Cycle: Start with a power cycle.
- Inspect Wiring: Unplug the refrigerator. Check the wire harness connector at the refrigerator fan motor and trace it back to the main board, checking connections.
- Check for Obstructions: Unplug the refrigerator. Inspect the refrigerator fan blade for obstructions preventing its movement.
- Test Fan Motor: (Requires multimeter) Unplug the refrigerator. Test the refrigerator fan motor for resistance or voltage supply. Refer to the technical specifications section below for typical voltage test points.
- Main Board: If the wiring, fan motor, and rotation are okay, the main control board might be the issue.
E IF: Ice Maker Fan Error
- Meaning: This error indicates a problem with the ice maker fan motor (if your model has one; not all ice makers use a dedicated fan). This fan helps cool the ice maker area or circulate air.
- Potential Causes:
- Faulty wire harness connection to the ice maker fan.
- Ice or other obstruction preventing the fan blade from spinning freely.
- Faulty ice maker fan motor.
- Faulty main control board.
- Troubleshooting Steps:
- Power Cycle: Start with a power cycle.
- Inspect Wiring: Unplug the refrigerator. Check the wire harness connector at the ice maker fan motor and trace it back to the main board, checking connections.
- Check for Obstructions/Ice: Unplug the refrigerator. Inspect the ice maker fan blade for obstructions, especially ice buildup.
- Test Fan Motor: (Requires multimeter) Unplug the refrigerator. Test the ice maker fan motor for resistance or voltage supply. Refer to the technical specifications section below for typical voltage test points.
- Main Board: If the wiring, fan motor, and rotation are okay, the main control board might be the issue.
E dH: Defrost Heater Error
- Meaning: This code indicates a failure in the defrost system. Specifically, the defrost sensor did not detect a temperature above 5°C (41°F) within 1 hour and 20 minutes of the defrost cycle starting. This typically means the defrost heater or thermal fuse is not working, leading to ice buildup on the evaporator coils.
- Potential Causes:
- Faulty wire harness connection to the defrost heater or thermal fuse.
- Faulty defrost thermal-fuse (a safety device that blows if the heater gets too hot).
- Faulty defrost heater.
- Faulty main control board (unable to activate the defrost cycle).
- Troubleshooting Steps:E F
- Power Cycle: Start with a power cycle.
- Inspect Wiring: Unplug the refrigerator. Check the wire harness connectors for the defrost heater and thermal fuse (usually located near the evaporator coil behind the rear freezer panel).
- Test Heater and Fuse: (Requires multimeter) Unplug the refrigerator. Test the resistance of the defrost heater and the thermal-fuse using a multimeter. Refer to the technical specifications section below for typical resistance values. If either shows infinite resistance (open circuit), it needs replacement.
- Main Board: If the heater, fuse, and wiring test correctly, the main control board may be faulty.
E dL: Left Auto Drawer Module Error
- Meaning: This error indicates a problem with the automatic movement system for the left auto drawer. The module did not reach its expected position (home or open/closed) within a set time limit (usually 5 seconds).
- Related Error Codes:
E dr: Right auto drawer module error.E Ad: Auto door module error.I Ld: Auto smart drawer module error.U Ld: Smart auto lift module error.U LS: Smart auto lift switch error.
- Potential Causes:
- Obstruction preventing the drawer from moving freely.
- Faulty wire harness connection to the drawer module.
- Faulty Hall sensor (detects drawer position).
- Faulty drawer motor.
- Faulty drawer module connection or internal fault.
- Faulty main control board.
- Troubleshooting Steps:
- Power Cycle: Start with a power cycle.
- Check for Obstructions: Unplug the refrigerator. Inspect the drawer track and the area around the drawer for any items blocking its movement.
- Inspect Wiring: Unplug the refrigerator. Check the wire harness connector to the left auto drawer module.
- Test Hall Sensor: (Requires multimeter) Unplug the refrigerator. Test the Hall sensor’s resistance. Also, check for voltage supply to the Hall sensor wires (+5V to +10V DC). Refer to the technical specifications section below for typical values. If the Hall sensor has voltage but shows incorrect resistance or doesn’t function, replace the sensor. If the Hall sensor doesn’t receive the correct voltage, the main board is likely faulty.
- Test Drawer Motor: (Requires multimeter) Test the drawer motor itself for resistance or continuity.
- Check Drawer Module: The entire drawer module assembly may be faulty and require replacement.
- Main Board: If components and wiring check out, the main board might be the issue.
F dS: Defrost Sensor Error
- Meaning: This code indicates a problem with the defrost temperature sensor, which monitors the temperature of the evaporator coil during the defrost cycle. A fault can prevent proper defrosting, leading to ice buildup.
- Potential Causes:
- Faulty wire harness connection to the sensor.
- Sensor connector disconnected, short-circuited, or open-circuited.
- Faulty defrost sensor itself.
- Faulty main control board.
- Troubleshooting Steps:
- Power Cycle: Start with a power cycle.
- Inspect Wiring: Unplug the refrigerator. Check the wire harness connector for the defrost sensor (usually located near the evaporator coil) and check its connection at the main board.
- Test Sensor: (Requires multimeter) Unplug the refrigerator. Test the resistance of the defrost sensor using a multimeter. Refer to the technical specifications section below for typical resistance values based on temperature. If the resistance is outside the expected range, replace the sensor.
- Main Board: If the sensor and wiring test correctly, the main board might be the issue.
E FS: Freezer Sensor Error
- Meaning: This code indicates a problem with the freezer compartment temperature sensor. This sensor is essential for monitoring and controlling the freezer’s temperature.
- Potential Causes:
- Faulty wire harness connection to the sensor.
- Sensor connector disconnected, short-circuited, or open-circuited.
- Faulty freezer sensor itself.
- Faulty main control board.
- Troubleshooting Steps:
- Power Cycle: Start with a power cycle.
- Inspect Wiring: Unplug the refrigerator. Check the wire harness connector for the freezer sensor and check its connection at the main board.
- Test Sensor: (Requires multimeter) Unplug the refrigerator. Test the resistance of the freezer sensor using a multimeter. Refer to the technical specifications section below for typical resistance values based on temperature. If the resistance is outside the expected range, replace the sensor.
- Main Board: If the sensor and wiring test correctly, the main board might be the issue.
E rS: Refrigerator Sensor Error
- Meaning: This code indicates a problem with the main refrigerator compartment temperature sensor (often designated R1 or upper part sensor). This sensor is crucial for monitoring and controlling the fresh food section’s temperature.
- Related Error Code:
E r2: Indicates an error with a second refrigerator temperature sensor (if applicable). Troubleshooting is similar toE rS.
- Potential Causes:
- Faulty wire harness connection to the sensor.
- Sensor connector disconnected, short-circuited, or open-circuited.
- Faulty refrigerator sensor itself.
- Faulty main control board.
- Troubleshooting Steps:
- Power Cycle: Start with a power cycle.
- Inspect Wiring: Unplug the refrigerator. Check the wire harness connector for the refrigerator sensor and check its connection at the main board.
- Test Sensor: (Requires multimeter) Unplug the refrigerator. Test the resistance of the refrigerator sensor using a multimeter. Refer to the technical specifications section below for typical resistance values based on temperature. If the resistance is outside the expected range, replace the sensor.
- Main Board: If the sensor and wiring test correctly, the main board might be the issue.
E HS: Humidity Sensor Error
- Meaning: This code indicates a problem with the room humidity sensor. This sensor is used by some models for features like humidity-controlled drawers or optimal cooling algorithms based on ambient conditions.
- Potential Causes:
- Faulty wire harness connection to the sensor.
- Sensor connector disconnected, short-circuited, or open-circuited.
- Faulty humidity sensor itself.
- Faulty main control board.
- Troubleshooting Steps:
- Power Cycle: Start with a power cycle.
- Inspect Wiring: Unplug the refrigerator. Check the wire harness connector for the humidity sensor and check its connection at the main board.
- Test Sensor: (Requires multimeter) Test the voltage output of the humidity sensor using a multimeter as per your service manual. Replace the sensor if it’s not providing a valid signal.
- Main Board: If the sensor and wiring check correctly, the main board might be the issue.
E rt: Room Temperature Sensor Error
- Meaning: This code indicates a problem with the sensor that measures the ambient room temperature around the refrigerator. This information is used by the control system for optimal performance.
- Potential Causes:
- Faulty wire harness connection to the sensor.
- Sensor connector disconnected, short-circuited, or open-circuited.
- Faulty room temperature sensor itself.
- Faulty main control board.
- Troubleshooting Steps:
- Power Cycle: Start with a power cycle.
- Inspect Wiring: Unplug the refrigerator. Check the wire harness connector for the room temperature sensor and check its connection at the main board.
- Test Sensor: (Requires multimeter) Unplug the refrigerator. Test the resistance of the room temperature sensor using a multimeter. Refer to the technical specifications section below for typical resistance values based on temperature. If the resistance is outside the expected range, replace the sensor.
- Main Board: If the sensor and wiring test correctly, the main board might be the issue.
E Id: Craft Ice Maker Sensor Error
- Meaning: This code indicates a problem with a temperature sensor specifically within the craft ice maker unit.
- Potential Causes:
- Faulty wire harness connection to the sensor.
- Sensor connector disconnected, short-circuited, or open-circuited.
- Faulty craft ice maker sensor.
- Faulty main control board.
- Troubleshooting Steps:
- Power Cycle: Start with a power cycle.
- Inspect Wiring: Unplug the refrigerator. Check the wire harness connector for the craft ice maker sensor (usually located on the ice maker assembly) and check its connection at the main board.
- Test Sensor: (Requires multimeter) Unplug the refrigerator. Test the resistance of the craft ice maker sensor using a multimeter.
- Main Board: If the sensor and wiring test correctly, the main board might be the issue.
E IS: Ice Maker Sensor Error
- Meaning: This code indicates a problem with the main ice maker temperature sensor. This sensor helps the ice maker cycle correctly (freezing, harvesting). A fault can cause ice production problems or blockages.
- Potential Causes:
- Faulty wire harness connection to the sensor.
- Sensor connector disconnected, short-circuited, or open-circuited.
- Faulty ice maker sensor.
- Faulty main control board.
- Troubleshooting Steps:
- Power Cycle: Start with a power cycle.
- Inspect Wiring: Unplug the refrigerator. Check the wire harness connector for the ice maker sensor (usually located on the ice maker assembly) and check its connection at the main board.
- Test Sensor: (Requires multimeter) Unplug the refrigerator. Test the resistance of the ice maker sensor using a multimeter.
- Main Board: If the sensor and wiring test correctly, the main board might be the issue.
E IU: Craft Ice Maker Unit Error
- Meaning: This code indicates a general problem detected within the craft ice maker assembly itself, potentially involving the stepper motor, Hall sensor, or one of its heaters.
- Potential Causes:
- Faulty components within the craft ice maker assembly (stepper motor, Hall IC, sensor, heater).
- Faulty wire harness connection to the assembly.
- Faulty main control board.
- Faulty display board (user interface).
- Troubleshooting Steps:
- Power Cycle: Start with a power cycle.
- Inspect Wiring: Unplug the refrigerator. Check the wire harness connector(s) for the craft ice maker assembly.
- Inspect Assembly: Unplug the refrigerator. Visually inspect the craft ice maker assembly for any obvious damage or obstructions. Testing individual components within the assembly (stepper motor, Hall sensor, heater, sensor) requires specific knowledge and tools.
- Test Main Board: If wiring appears fine, the main control board may be at fault.
- Test Display Board: Less common for this error, but a faulty user interface/display board can sometimes cause communication issues leading to this code.
E It: Ice Maker Unit Error
- Meaning: This code indicates a general problem with the main ice maker assembly’s motor operation.
- Potential Causes:
- Ice buildup or obstruction overloading the ice maker motor.
- The ice maker unit is not properly connected.
- Damaged ice maker unit motor or Hall IC (detects motor position).
- Faulty main control board.
- Troubleshooting Steps:
- Power Cycle: Start with a power cycle.
- Check for Obstructions/Ice: Unplug the refrigerator. Check the ice maker assembly and the ice bin for excessive ice buildup or other obstructions preventing the ejector arm from moving. Manually remove any blockages.
- Check Unit Connection: Unplug the refrigerator. Ensure the ice maker unit is correctly seated and its electrical connector is fully plugged in.
- Inspect Wiring: Unplug the refrigerator. Check the wire harness connector for the ice maker motor.
- Test Motor: (Requires multimeter) Unplug the refrigerator. Test the ice maker motor’s voltage supply when it’s supposed to cycle. Testing the motor/Hall IC itself requires specific knowledge. Replace the ice maker assembly if the motor is suspected faulty.
- Test Main Board: If motor, connections, and obstructions are ruled out, the main board might be faulty.
- Test User Interface Board: (Less likely cause but possible) A faulty UI board could potentially cause communication errors.
E CH: High Side Cycle Leakage Warning
- Meaning: This is a serious warning indicating a potential refrigerant leak or issue on the high-pressure side of the sealed refrigeration system. It’s detected through abnormal temperature readings and compressor feedback.
- Related Error Code:
E CL: Indicates a potential refrigerant leak or issue on the low-pressure side of the sealed system.
- Potential Causes:
- Refrigerant leak in the high-pressure lines or components.
- Faulty sealed system component (e.g., valve).
- Problem with the compressor or associated electronics detected by the main board.
- Troubleshooting Steps:
- This error indicates a problem with the sealed refrigeration system, which contains refrigerant gas. This is NOT a DIY repair. Refrigerant is a regulated substance and dealing with sealed systems requires specialized tools, knowledge, and licenses.
- Action: Unplug the refrigerator and contact a qualified appliance technician immediately.
E FU: Failing Unit Error
- Meaning: This general error message typically indicates that the freezer compartment is not reaching or maintaining its target temperature.
- Potential Causes:
- Refrigerator recently plugged in or undergoing initial cool-down.
- Door left open for too long or not sealing properly.
- Insufficient cooling process (could be related to sealed system, fan issues, or defrost issues covered by other codes).
- Food blocking air vents.
- Faulty temperature sensor (like E FS).
- Faulty main control board.
- Troubleshooting Steps:
- Allow Cool Down: If the refrigerator was recently installed or powered on, give it ample time (up to 24 hours) to reach the set temperature.
- Check Settings: Ensure the freezer temperature is set correctly (e.g., -18°C / 0°F).
- Check Door Seal and Usage: Ensure the freezer door is closing fully and the gasket is sealing properly (use the paper test – if a piece of paper slips out easily when closed in the door, the seal might be weak). Minimize how long the door is open.
- Check Airflow: Ensure food items are not blocking the air vents inside the freezer compartment. Cold air needs to circulate freely.
- Check for Ice Buildup: Significant ice buildup on the rear panel inside the freezer can indicate a defrost problem (related to E dH or F dS), which restricts airflow and cooling. Manual defrosting may be necessary.
- Check Freezer Fan (E FF): Ensure the freezer fan is running.
- Check Freezer Sensor (E FS): The freezer sensor might be faulty, reporting an incorrect temperature.
- Main Board: If all other checks pass, the main control board could be faulty.
E gF: Flow Meter Sensor Error
- Meaning: This error indicates a problem detected with the water flow meter sensor, which measures the amount of water dispensed.
- Potential Causes:
- Water supply valve is off or not fully open.
- Kinked or frozen water line.
- Low water pressure.
- Faulty water flow meter.
- Sensor disconnection or short circuit.
- Faulty main control board.
- Troubleshooting Steps:
- Power Cycle: Start with a power cycle.
- Check Water Supply: Ensure the water supply valve to the refrigerator is fully open and that the water line isn’t kinked or frozen.
- Check Water Pressure: Verify that your household water pressure is adequate for the dispenser.
- Inspect Wiring: Unplug the refrigerator. Check the wire harness connector to the flow meter (usually near the water filter housing or water valve area).
- Test Flow Meter: (Requires multimeter) Unplug the refrigerator. Test the resistance of the Hall sensor within the flow meter. Refer to the technical specifications section below for typical resistance values (often around 17.4 kΩ). If it’s outside the range or shows open/short circuit, replace the flow meter.
- Main Board: If the water supply, pressure, flow meter, and wiring are fine, the main board might be faulty.
E gS: Gas Sensor Error
- Meaning: This error indicates a problem with the gas sensor system. In LG refrigerators, this system is typically related to controlling features like the PureNFresh (air filter) ventilation system.
- Potential Causes:
- Faulty gas sensor.
- Faulty wire harness connection.
- Faulty main control board.
- Troubleshooting Steps:
- Power Cycle: Start with a power cycle.
- Inspect Wiring: Unplug the refrigerator. Check the wire harness connection to the gas sensor (location varies by model, often near the air filter or vents).
- Test Sensor: Testing the gas sensor requires specific equipment and procedures, usually only done by technicians.
- Main Board: If the sensor and wiring appear intact, the main board may be the issue.
LG Refrigerator Notifications (Not Error Codes):
These codes are informational and do not indicate a fault with the refrigerator’s operation, but rather a specific mode it’s in.
OFF: Demo Mode Notification
- Meaning: The refrigerator is running in “Showroom Mode” or “Demo Mode.” In this mode, the cooling system is typically disabled, but the lights and display remain active for display purposes.
- Solution: You need to deactivate Demo Mode.
- Method 1: Press and hold the REFRIGERATOR button and press the Express FRZ button 3 times quickly. You should hear a ‘Ding’ sound confirming deactivation.
- Method 2: Press and hold the REFRIGERATOR and Express FRZ buttons simultaneously for about 3 seconds. You should hear a ‘Ding’ sound.
- Note: The exact button combination can vary slightly by model. Refer to your LG owner’s manual for the precise method for your refrigerator.
Sb: Sabbath Mode Notification (May appear as S6, 5b, or 56)
- Meaning: The refrigerator is in Sabbath Mode, designed for observance of the Jewish Shabbat and holidays. This mode disables certain functions to comply with religious requirements (e.g., lights, alarms, dispenser, temperature adjustments, Wi-Fi).
- Solution:
- To Turn On: Press and hold the SMART GRID and FREEZER buttons together for about 3 seconds.
- To Turn Off: Repeat the same process (press and hold SMART GRID and FREEZER for 3 seconds). The mode will also automatically turn off after 96 hours on most models.
- Note: The exact button combination may vary by model. Consult your owner’s manual.
LG Refrigerator Environmental Notifications:
These indicate the ambient room temperature is outside the refrigerator’s recommended operating range (climate class).
Hi: High Room Temperature Notification
- Meaning: The sensor detects that the ambient room temperature around the refrigerator has exceeded +50°C (122°F). This is outside the normal operating limits for most refrigerators and can affect performance.
- Related Error Code:
Lo: Indicates the ambient room temperature has fallen below -10°C (14°F). This is also outside the normal operating limits.
- Solution: Move the refrigerator to a location where the ambient temperature is within the range specified in your refrigerator’s owner’s manual (its climate class). The notification should clear once the temperature is back within the acceptable range.
LG Refrigerator Technical Reference: Component Specifications (Typical Values)
These values are approximate and can vary slightly by model. Always refer to your specific model’s service manual if possible. Resistance checks should be done with the component unplugged from the circuit. Voltage checks require the unit to be powered on.
Sensor Resistance Values (Measured in Ohms, Ω)
| Electric Part Name | Temperature | Typical Ohmic Value |
|---|---|---|
| Defrost Sensor (F dS) | 25°C / 77°F | ~9,800 Ω (9.8 kΩ) |
| Freezer Sensor (E FS) | 25°C / 77°F | ~2,300 Ω (2.3 kΩ) |
| Refrigerator Sensor (E rS) | 25°C / 77°F | ~9,800 Ω (9.8 kΩ) |
| Room Temp Sensor (E rt) | 25°C / 77°F | ~9,800 Ω (9.8 kΩ) |
| Flow Meter Hall Sensor (E gF) | N/A (Component test) | ~17,400 Ω (17.4 kΩ) |
| Auto Drawer Hall Sensor (E dL, etc.) | N/A (Component test) | ~17,400 Ω (17.4 kΩ) |
| Ice Maker Sensor (E IS) | Varies by model/temperature | Varies |
| Craft Ice Maker Sensor (E Id) | Varies by model/temperature | Varies |
Note: Sensor resistance changes with temperature. These values are typical at 25°C (77°F). Consult a temperature-resistance chart for accurate testing at other temperatures.
Fan Motor Voltage Test Points (Typical DC Voltage)
| Electric Part Name | Wire Colors (Typical) | Test Points | Typical Main Voltage | Typical Feedback Voltage | Typical PWM Voltage |
|---|---|---|---|---|---|
| Condenser Fan | 4 wires (VCC, GND, FG, PWM) | VCC & GND | ~12 Vdc | N/A | N/A |
| FG & GND | N/A | ~2.4 Vdc | N/A | ||
| PWM & GND | N/A | N/A | 1.2 to 4.6 Vdc | ||
| Condenser Fan | 3 wires (VCC, GND, FG) | VCC & GND | ~12 Vdc | N/A | N/A |
| FG & GND | N/A | ~2.4 Vdc | N/A | ||
| Freezer Fan | 4 wires (VCC, GND, FG, PWM) | VCC & GND | ~12 Vdc | N/A | N/A |
| FG & GND | N/A | ~2.4 Vdc | N/A | ||
| PWM & GND | N/A | N/A | 1.2 to 4.6 Vdc | ||
| Freezer Fan | 3 wires (VCC, GND, FG) | VCC & GND | ~12 Vdc | N/A | N/A |
| FG & GND | N/A | ~2.4 Vdc | N/A | ||
| Refrigerator Fan | 4 wires (VCC, GND, FG, PWM) | VCC & GND | ~12 Vdc | N/A | N/A |
| FG & GND | N/A | ~2.4 Vdc | N/A | ||
| PWM & GND | N/A | N/A | 1.2 to 4.6 Vdc | ||
| Refrigerator Fan | 3 wires (VCC, GND, FG) | VCC & GND | ~12 Vdc | N/A | N/A |
| FG & GND | N/A | ~2.4 Vdc | N/A | ||
| Ice Maker Fan | 4 wires (VCC, GND, FG, PWM) | VCC & GND | ~12 Vdc | N/A | N/A |
| FG & GND | N/A | ~2.4 Vdc | N/A | ||
| PWM & GND | N/A | N/A | 1.2 to 4.6 Vdc |
Note: VCC is Main Voltage, GND is Ground, FG is Feedback Signal, PWM is Pulse Width Modulation signal.
Defrost Heater & Thermal-Fuse Resistance (Measured in Ohms, Ω)
| Electric Part Name | Condition | Typical Ohmic Value | Abnormal Value |
|---|---|---|---|
| Defrost Heater (E dH) | At room temperature | ~50 Ω | OL or ∞ Ω |
| Thermal-Fuse (E dH) | ~76°C / 169°F cutoff | 0.1 – 1.2 Ω | OL or ∞ Ω |
Note: OL (Over Limit) or ∞ Ω (Infinity Ohms) on a multimeter indicates an open circuit.
When to Call a Professional: LG Refrigerator Error Codes
While this guide provides troubleshooting steps, some issues are complex or dangerous for DIY repair. You should contact a qualified LG appliance technician if:
- You are not comfortable performing electrical tests or disassembling parts of your refrigerator.
- The error code relates to the sealed system (E CH, E CL).
- You’ve followed the relevant troubleshooting steps and the issue persists.
- You suspect a faulty main control board, as these are expensive parts and require careful handling and programming.
By understanding these LG Refrigerator error codes and following safe troubleshooting practices, you can potentially resolve minor issues or provide valuable information to a technician if a repair is needed.
