This guide delves into common Hisense refrigerator error codes, their meanings, and actionable troubleshooting steps.
While some issues can be addressed with simple checks and fixes, others may require technical expertise. Always unplug your refrigerator before attempting any inspection or repair.
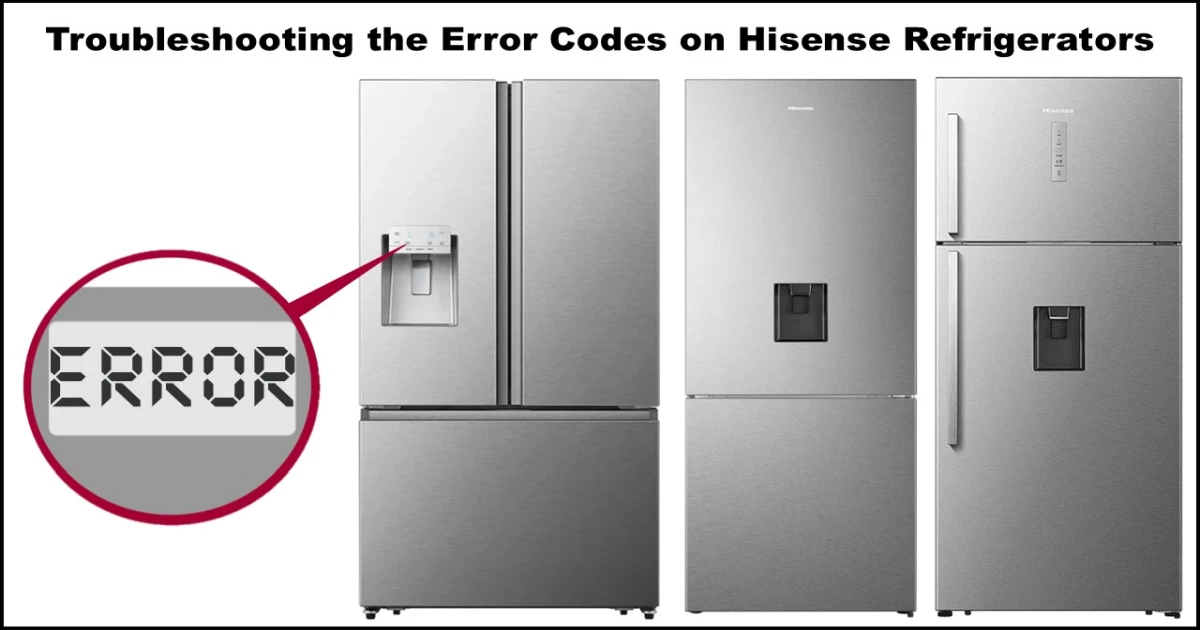
Understanding Common Hisense Refrigerator Error Codes
Here’s a breakdown of frequently encountered error codes:
Sensor Errors (Typically E codes): These codes often indicate a problem with a temperature or humidity sensor, which are crucial for maintaining the correct internal climate. A faulty sensor can lead to incorrect temperature readings and inefficient cooling.
E0: Room Temperature Sensor Error
- Meaning: The refrigerator’s main board is detecting an issue (open or short circuit) with the sensor that measures the ambient room temperature.
- Troubleshooting:
- Unplug the refrigerator.
- Locate the room temperature sensor (its location can vary by model, often near the control panel or at the top of the fresh food compartment).
- Check the wiring connected to the sensor and the main control board for any visible damage or loose connections. Secure any loose wires.
- If you have a multimeter, you can test the sensor’s resistance. At approximately 25°C (77°F), the resistance should be around 2 kΩ. Significant deviation suggests a faulty sensor.
- Likely Cause: Faulty room temperature sensor or wiring issue.
- Difficulty: Moderate (requires locating the sensor and potentially using a multimeter).
E1: Refrigerator Sensor Error
- Meaning: Indicates a problem with the sensor monitoring the temperature within the refrigerator compartment (fresh food section).
- Troubleshooting:
- Unplug the refrigerator.
- Locate the refrigerator sensor (typically inside the refrigerator compartment, often near the top or on the rear wall).
- Inspect the wiring and connections between the sensor and the main board for damage or looseness.
- Using a multimeter, measure the sensor’s resistance. At around 25°C (77°F), expect a reading near 2 kΩ.
- Likely Cause: Faulty refrigerator sensor or wiring issue.
- Difficulty: Moderate (requires locating the sensor and potentially using a multimeter).
E2: Temperature Fluctuation Error
- Meaning: This code often suggests the refrigerator is having trouble maintaining a stable internal temperature. While not explicitly a sensor failure in all cases, it can be triggered by sensor inaccuracies or other cooling system issues.
- Troubleshooting:
- Check if vents inside the refrigerator and freezer are obstructed by food items, blocking airflow.
- Inspect the door seals for any gaps or damage that could be letting warm air in. Clean the seals and the surface they contact.
- Ensure the temperature settings are correct.
- Allow the refrigerator sufficient time to stabilize temperature after power interruptions or large additions of food.
- Likely Cause: Obstructed airflow, faulty door seals, incorrect temperature settings, or underlying cooling system problems.
- Difficulty: Easy to Moderate (checking airflow and seals is easy; diagnosing cooling system is complex).
E3: Freezer Sensor Error
- Meaning: Indicates a problem with the sensor that monitors the temperature in the freezer compartment.
- Troubleshooting:
- Unplug the refrigerator.
- Locate the freezer sensor (typically inside the freezer compartment, often near the evaporator coils behind a panel).
- Check the wiring and connections between the sensor and the main board for damage or looseness.
- Use a multimeter to measure the sensor’s resistance. At around 25°C (77°F), look for a reading near 2 kΩ.
- Likely Cause: Faulty freezer sensor or wiring issue.
- Difficulty: Moderate to Difficult (accessing the sensor in the freezer may require removing panels and dealing with potential ice buildup, plus using a multimeter).
E4: Freezer Defrost Sensor Error
- Meaning: Points to a problem with the sensor that monitors the temperature of the freezer evaporator coils during the defrost cycle.
- Troubleshooting:
- Unplug the refrigerator.
- The defrost sensor is located on the freezer evaporator coils (behind a rear panel in the freezer).
- Check the wiring and connections for damage or looseness.
- Measure the sensor’s resistance with a multimeter. At around 25°C (77°F), the resistance should be close to 2 kΩ.
- Inspect the evaporator coils for excessive ice buildup, which could affect the sensor’s reading.
- Likely Cause: Faulty defrost sensor, wiring issue, or excessive ice buildup on the evaporator.
- Difficulty: Difficult (requires accessing the freezer evaporator, dealing with potential ice, and using a multimeter).
E5: Convertible Sensor Error
- Meaning: This error occurs on models with a convertible zone (can be used as a refrigerator or freezer) and indicates a problem with the sensor in that section.
- Troubleshooting:
- Unplug the refrigerator.
- Locate the convertible sensor within the convertible compartment.
- Check the wiring and connections to the main board.
- Measure the sensor’s resistance with a multimeter (expect around 2 kΩ at 25°C/77°F).
- Likely Cause: Faulty convertible sensor or wiring issue.
- Difficulty: Moderate to Difficult (location of the sensor and access may vary by model, plus using a multimeter).
E6: Convertible Defrost Sensor Error
- Meaning: Similar to E4, but for the defrost sensor in the convertible zone.
- Troubleshooting:
- Unplug the refrigerator.
- Locate the convertible defrost sensor on the evaporator coils within the convertible compartment.
- Check wiring and connections.
- Measure sensor resistance (approximately 2 kΩ at 25°C/77°F).
- Check for ice buildup on the evaporator coils in the convertible zone.
- Likely Cause: Faulty convertible defrost sensor, wiring issue, or ice buildup.
- Difficulty: Difficult (requires accessing the evaporator in the convertible zone, dealing with potential ice, and using a multimeter).
E7: Outdoor Ambient Temperature Sensor Error
- Meaning: This code indicates a problem with a sensor that measures the ambient temperature outside the refrigerator. This sensor helps the refrigerator optimize cooling performance based on the surrounding environment. (Note: Some sources also link E7 to other appliance issues, so verify with your manual).
- Troubleshooting:
- Unplug the refrigerator.
- Locate the external temperature sensor (location can vary, may be on the rear exterior or near the bottom).
- Check the wiring and connections for any damage or looseness.
- Ensure the sensor is not directly exposed to heat sources or cold drafts that could skew its reading.
- While a specific resistance value isn’t always readily available without a service manual, you can check for obvious damage to the sensor or wiring.
- Likely Cause: Faulty external temperature sensor or wiring issue.
- Difficulty: Moderate (locating the external sensor may require moving the refrigerator).
E8: Humidity Sensor Error
- Meaning: Indicates a problem with the sensor that measures humidity inside the refrigerator, often located in the crisper drawer area. This sensor helps control humidity levels to keep produce fresh.
- Troubleshooting:
- Unplug the refrigerator.
- Locate the humidity sensor (usually in or near the crisper drawer).
- Check wiring and connections.
- The original text mentions a voltage test (around 2.10 Vdc at 40% humidity). This requires the refrigerator to be powered on and specialized knowledge to perform safely.
- Likely Cause: Faulty humidity sensor or wiring issue.
- Difficulty: Moderate to Difficult (locating the sensor is usually easy, but testing voltage requires caution and a multimeter).
E9: Ice Maker Sensor Error
- Meaning: Indicates a problem with the sensor in the ice maker assembly, which helps regulate ice production.
- Troubleshooting:
- Unplug the refrigerator.
- Access the ice maker assembly (location varies, often in the freezer door or top of the freezer compartment).
- Locate the ice maker sensor within the assembly.
- Check wiring and connections.
- Measure the sensor’s resistance with a multimeter (approximately 2 kΩ at 25°C/77°F).
- Inspect the ice maker for ice buildup that might be obstructing the sensor.
- Likely Cause: Faulty ice maker sensor, wiring issue, or ice buildup.
- Difficulty: Moderate to Difficult (accessing the ice maker and its components can be tricky).
EA: Ice Room Sensor Error
- Meaning: Points to a problem with a sensor specifically located in the ice storage bin or ice room, if your model has one.
- Troubleshooting:
- Unplug the refrigerator.
- Locate the ice room sensor (in or near the ice storage area).
- Check wiring and connections.
- Measure sensor resistance with a multimeter (around 2 kΩ at 25°C/77°F).
- Likely Cause: Faulty ice room sensor or wiring issue.
- Difficulty: Moderate (locating and accessing the sensor may vary by model).
- When to Call a Technician: If testing the sensor is outside your comfort level, call a professional.
Fan Errors (Typically F codes): These errors usually relate to issues with the various fans responsible for circulating cold air within the refrigerator and dissipating heat.
F0: Condenser Fan Error
- Meaning: Indicates a problem with the condenser fan, located near the compressor at the back or bottom of the refrigerator. This fan cools the condenser coils.
- Troubleshooting:
- Unplug the refrigerator.
- Carefully move the refrigerator away from the wall to access the rear.
- Locate the condenser fan.
- Check the wiring to the fan for damage or loose connections.
- Inspect the fan blade for obstructions (dust, debris) and spin it manually to see if it turns freely. Clean the fan blades and the condenser coils.
- The original text mentions checking voltage (approximately 12Vdc main, 2.3 Vdc feedback). This requires the refrigerator to be plugged in and specialized tools/knowledge, which is risky for a DIYer.
- Likely Cause: Obstructed fan blade, faulty fan motor, or wiring issue. Dirty condenser coils can sometimes overwork the fan.
- Difficulty: Moderate (requires moving the refrigerator and working near electrical components).
F1: Freezer Fan Error
- Meaning: Indicates a problem with the fan located in the freezer compartment, which circulates cold air.
- Troubleshooting:
- Unplug the refrigerator.
- The freezer fan is located inside the freezer, usually behind a rear panel.
- Access the fan and check the wiring for damage or loose connections.
- Inspect the fan blade for ice buildup. Excessive ice can prevent the fan from turning. This may indicate a problem with the defrost system (heater or thermo-fuse).
- Manually try to spin the fan blade (carefully). It should turn freely once any ice is removed.
- Voltage checks (approx. 12Vdc main, 2.3 Vdc feedback) require the unit to be powered and are best left to a technician.
- Likely Cause: Ice buildup on the fan blade, faulty fan motor, or a problem with the defrost system.
- Difficulty: Difficult (requires disassembling the freezer interior and dealing with potential ice).
F2: Communication Fault (between Main and Display Boards)
- Meaning: This error code, seen in some Hisense refrigerator models, can indicate a communication problem between the main control board and the display board. (Note: Some sources also link F2 to freezer sensor issues, so verify with your manual).
- Troubleshooting:
- Unplug the refrigerator for at least 5-10 minutes to attempt a system reset.
- Check the wiring harness connecting the main control board and the display board for any loose connections or visible damage. Ensure they are securely plugged in.
- Likely Cause: Loose wiring harness, faulty main control board, or faulty display board.
- Difficulty: Moderate (requires accessing the control boards, which may involve removing panels).
F3: Convertible Fan Error
- Meaning: Indicates a problem with the fan in the convertible zone, responsible for circulating air in that compartment.
- Troubleshooting:
- Unplug the refrigerator.
- Access the fan in the convertible compartment.
- Check wiring and connections.
- Inspect the fan blade for ice buildup and obstructions.
- Manually spin the fan blade.
- Voltage checks are best left to a technician.
- Likely Cause: Ice buildup on the fan blade, faulty fan motor, or a problem with the defrost system in the convertible zone.
- Difficulty: Difficult (requires disassembling the convertible zone interior and dealing with potential ice).
F4: Internal Fan Fault (potentially Refrigerator or Freezer depending on model)
- Meaning: This code can broadly indicate a fault with an internal fan, potentially the refrigerator or freezer fan depending on the specific Hisense model.
- Troubleshooting:
- Unplug the refrigerator.
- Inspect both the refrigerator and freezer fans (locations described under F1 and potentially in the refrigerator compartment).
- Check for obstructions or ice buildup on the fan blades.
- Verify wiring connections.
- Manually spin the fan blades to check for free movement.
- Likely Cause: Obstructed or faulty internal fan motor (either fridge or freezer), ice buildup, or wiring issue.
- Difficulty: Moderate to Difficult (requires accessing internal fans).
FH: Heating Fault (potentially Defrost Heater related)
- Meaning: While often associated with Hisense hobs, an “FH” code on a refrigerator is highly likely to indicate a fault within a heating circuit. The most common heating element in a frost-free refrigerator is the defrost heater in the freezer or convertible compartment.
- Troubleshooting:
- Unplug the refrigerator.
- Access the evaporator coils in the freezer and/or convertible zone (behind rear panels).
- Inspect the defrost heater for visible damage.
- Check the wiring connections to the defrost heater and the defrost thermostat (thermo-fuse).
- Testing the defrost heater and thermo-fuse requires a multimeter and knowledge of expected resistance values (thermo-fuse should have very low resistance when cold, heater resistance varies but should not be open circuit). This is a more advanced test.
- Likely Cause: Faulty defrost heater, faulty defrost thermostat (thermo-fuse), or wiring issue in the defrost circuit.
- Difficulty: Difficult (requires accessing the evaporator and testing electrical components).
- When to Call a Technician: Issues with the defrost heating circuit are complex and involve electrical components operating in a cold, sometimes icy, environment. Professional repair is strongly recommended.
Communication Errors: These codes indicate issues with the electronic communication between different control boards in the refrigerator.
Ec: Communication Sending Error
- Meaning: The display board (user interface) is failing to send signals to the main control board.
- Troubleshooting:
- Unplug the refrigerator.
- Check the wiring harness connecting the display board to the main control board for any loose connections or damage. Ensure the connectors are firmly seated.
- Likely Cause: Loose or damaged wiring harness, faulty display board, or faulty main control board.
- Difficulty: Moderate (requires accessing the control boards and checking connections).
Er: Communication Receiving Error
- Meaning: The display board (user interface) is failing to receive signals from the main control board.
- Troubleshooting:
- Unplug the refrigerator.
- Check the wiring harness connecting the main control board to the display board for any loose connections or damage. Ensure the connectors are firmly seated.
- Likely Cause: Loose or damaged wiring harness, faulty main control board, or faulty display board.
- Difficulty: Moderate (requires accessing the control boards and checking connections).
Ice Maker Specific Error:
Eb: Ice Maker Error
- Meaning: Indicates a problem specifically with the ice maker, often related to its initialization process or motor function.
- Troubleshooting:
- Unplug the refrigerator.
- Inspect the ice maker assembly for any visible ice buildup that might be jamming the mechanism. If present, carefully thaw the ice.
- Check if the ice bin is correctly inserted and not overfilled.
- Some ice makers have a test button; pressing it might help diagnose if the motor is attempting to cycle. Consult your manual for its location and function.
- Check the wiring connection to the ice maker assembly.
- Inspect the ice maker motor and other components within the assembly for visible damage.
- Likely Cause: Ice jam, faulty ice maker motor, wiring issue, or problem with the ice maker’s water fill.
- Difficulty: Moderate (accessing and inspecting the ice maker assembly can vary in difficulty).
Door Related Error:
dr: Door Switch Error / Door Open Alarm
- Meaning: This code typically indicates that a refrigerator or freezer door has been open for too long, or there is an issue with the door switch itself.
- Troubleshooting:
- Ensure the door(s) are fully closed and latched. Check for any obstructions preventing the door from closing properly (e.g., food items, shelves).
- Inspect the door gasket (seal) for damage or dirt that might prevent a tight seal. Clean the gasket and the refrigerator frame where it contacts.
- Locate the door switch(es) (usually near the door frame). Ensure they are not stuck and appear to be making proper contact when the door is closed.
- Check the wiring to the door switch(es) for looseness or damage.
- The original text mentions checking for 5Vdc at the door switch, which requires electrical testing and caution.
- Likely Cause: Door left open, obstructed door, faulty door seal, faulty door switch, or wiring issue.
- Difficulty: Easy to Moderate (checking door closure and seals is easy; testing the switch requires more care).
General Troubleshooting and Resetting Error Codes
For many error codes, a simple power cycle can sometimes clear temporary glitches. To do this:
- Unplug the refrigerator from the power outlet.
- Wait for at least 5-10 minutes. This allows the electronic control boards to fully discharge and reset.
- Plug the refrigerator back in.
If the error code reappears shortly after, it indicates a persistent issue that requires further investigation based on the specific code.
When to Seek Professional Help
While basic troubleshooting can resolve some Hisense refrigerator errors, certain issues are best left to qualified appliance repair technicians. This includes:
- Errors that persist after basic checks and power cycling.
- Issues requiring disassembly of internal compartments (freezer, convertible zone).
- Problems involving the sealed cooling system (compressor, condenser, evaporator, refrigerant).
- Any troubleshooting step that requires testing electrical voltage or complex component replacement.
- If you are uncomfortable or unsure about any step in the troubleshooting process.
Attempting complex repairs without the necessary knowledge and tools can be dangerous and may cause further damage to your appliance.
Preventing Future Errors Through Maintenance
Regular maintenance can help prevent some common error codes:
- Keep Condenser Coils Clean: Dust and debris on the condenser coils (usually at the back or bottom) can hinder cooling and overwork the condenser fan (F0 error). Clean them regularly with a vacuum cleaner or brush.
- Check Door Seals: Ensure door seals are clean and intact to prevent warm air from entering, which can affect temperature sensors (E0, E1, E3) and cause ice buildup (F1, F3, E4, E6).
- Ensure Proper Airflow: Avoid overpacking the refrigerator and freezer compartments, ensuring that vents are not blocked by food items. This promotes proper air circulation and helps sensors (E1, E3) read temperatures accurately and fans (F1, F3) operate efficiently.
- Inspect the Ice Maker: Periodically check the ice maker for ice jams or unusual operation (Eb, E9, EA).
By understanding Hisense refrigerator error codes and following these troubleshooting and maintenance tips, you can increase the lifespan of your appliance and keep it running smoothly. Remember to consult your refrigerator’s user manual for model-specific information and always prioritize safety.
I have a F1 error code on fridge freezer RQ758N4SAI1 batch BCWWR 4132355 began with increased noise when electric on then stopped working. i have taken both back panels off and found nothing wrong. how do i get to the fan you mention that could be iced up? or who do I contact to get an engineer. I live in Cornwall. it 3 yars old