Troubleshooting Haier Dishwasher Error Codes: A Troubleshooting Guide
This guide will help you understand the most common Haier dishwasher error codes, their potential causes, and steps you can take to fix the issue.
Important Safety Warning: Always unplug your dishwasher from the power outlet before attempting any inspection or repair involving internal components. Working with electrical appliances can be dangerous if proper precautions aren’t taken.
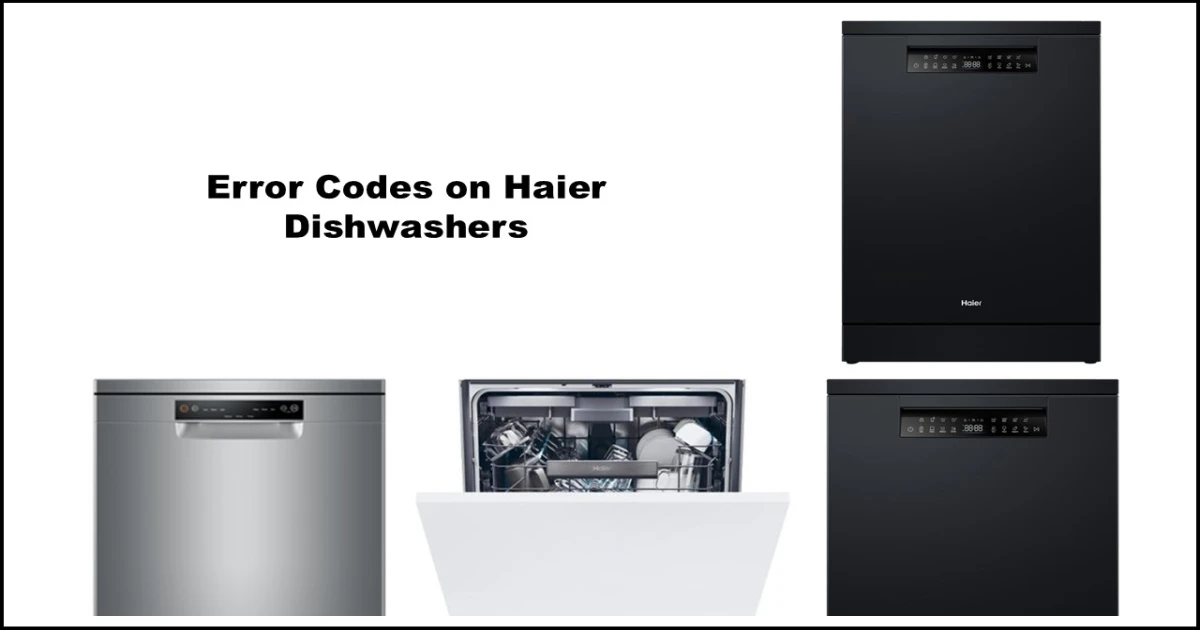
Haier dishwashers may use slightly different error code formats depending on the model (e.g., E10 vs E:10). This guide covers common codes you might encounter, grouping similar issues together.
Haier Dishwasher Error Code Summary Table
Note: Error codes may appear as E## or E:## depending on your specific model. Always unplug the dishwasher before inspecting components.
| Error Code(s) | Description | Common Causes | Key Troubleshooting Steps |
|---|---|---|---|
| Water Inlet Issues | |||
| E10, A10, E11, E12, E:02, E21 | Water fill problem | Tap closed, low pressure, clogged hose/filter, faulty valve/flow meter | Check tap/pressure, Clean hose/filter, Check inlet valve/flow meter |
| Drainage Issues | |||
| E20, A20, E:03 | Water drainage problem | Clogged filter/hose/siphon, faulty drain pump | Clean filter/hose/siphon, Check drain pump |
| Overflow / Leakage | |||
| E30, F30, E:04 | Water leak detected | Actual leak, faulty float switch, faulty inlet valve | Find leak source, Check overflow float switch, Check inlet valve |
| Sensor Issues | |||
| E40, F40, E41, E42, E:18 | Flow meter / Water level | Faulty flow meter, clogged air trap, faulty pressure switch | Check/Replace flow meter, Clean air trap, Check pressure switch |
| E70, F70, E:05, E:17 (partial) | Temperature sensor (NTC) | Faulty NTC thermistor | Check/Test NTC sensor resistance |
| E80, F80, E81, E82, E:09 | Turbidity sensor | Dirty or faulty sensor | Clean or replace turbidity sensor |
| Heating Issues | |||
| E60, F60, E:08, E:14, E:16, E:17 | Water heating problem | Faulty heater, thermostat, pressure switch, relay | Check/Test heater, thermostat, pressure switch, relay |
| Communication Issues | |||
| E50, F50, E51, E52, E:10 | Control board communication | Damaged harness, faulty UI/motor/main board | Check harnesses, Check/Replace UI/motor/main boards |
| Diverter Valve | |||
| EE0, FE0, E:23 | Diverter position error | Faulty diverter motor/switch | Check/Test diverter motor/switch |
| Power Supply | |||
| EA0, FA0, E:22 | Power frequency error | Incorrect power supply, faulty main board | Check power supply, Replace main board |
| Internal Memory | |||
| E:15 | EEPROM error | Faulty main board | Reprogram or replace main board (Authorized Service) |
| Motor Issues | |||
| E:07 | Wash motor pump error | Faulty motor, tachometer, or capacitor | Check/Test wash motor, tachometer, capacitor |
| Specific Switch Issues | |||
| E:16 | Pressure switch stuck | Faulty pressure switch or harness | Check harness, Replace pressure switch |
| Indicator Light | |||
| Lock Icon | Child Lock Active | Feature enabled by user | Press and hold designated lock button (check manual) |
Error Codes Related to Water Inlet Issues
These codes indicate that the dishwasher is having trouble filling with water properly.
- Codes: E10, A10, E11, E12, E:02, E21
- Description: The dishwasher is not receiving enough water, or the water inlet valve is not functioning correctly. E11/E12 specifically point to the tap being closed during the initial fill or a subsequent refill. E21 suggests the solenoid valve might be stuck open.
- Common Causes:
- The water tap is closed.
- Low water pressure from the supply.
- The water inlet hose is kinked, crushed, or blocked.
- The filter screen in the water inlet hose or valve is clogged.
- A faulty water inlet valve (solenoid valve).
- Issues with the flow meter (water liter counter/reed switch).
- Faulty pressure switch (involved in detecting water level).
- A problem with the main control board (PCB).
- Solutions:
- Unplug the dishwasher.
- Check that the water tap supplying the dishwasher is fully open.
- Verify that your home’s water pressure is adequate. Other taps in the house should have normal flow.
- Inspect the water inlet hose for any kinks, bends, or crushing. Straighten it if necessary.
- Turn off the water supply, disconnect the inlet hose from the tap and the dishwasher, and check/clean the small filter screens found at both ends of the hose and where it connects to the valve.
- Check the water inlet valve itself. You can often test its resistance with a multimeter (typical value around 3.2 ~ 4 kΩ). A faulty valve may need replacement.
- Issues with the flow meter or pressure switch usually require checking specific components (reed switch, air trap chamber, pressure switch hose) or professional service.
- If none of the above resolve the issue, the main PCB might be faulty.
Error Codes Related to Drainage Issues
These codes signal a problem with the dishwasher’s ability to drain water after a cycle.
- Codes: E20, A20, E:03
- Description: The dishwasher is not draining completely or within the expected time.
- Common Causes:
- The drain pump filter is clogged with debris.
- The drain hose is blocked or kinked.
- The kitchen sink drain or garbage disposal (if connected there) is blocked, creating a clogged siphon effect.
- A faulty drain pump.
- Issues with the drain pump wire harness connector.
- A problem with the main control board (PCB).
- Less commonly, a faulty turbidity sensor can sometimes be related if the machine incorrectly senses water is present.
- Solutions:
- Unplug the dishwasher.
- Open the dishwasher door and locate the drain pump filter at the bottom of the tub. Remove and thoroughly clean it.
- Inspect the drain hose for kinks or blockages. Disconnect it (usually from the sink drain/siphon or a dedicated standpipe) and check for obstructions.
- Check your kitchen sink drain to ensure it’s not blocked, as the dishwasher often drains into it.
- Check the drain pump itself. You can sometimes access it after removing panels. Test its resistance with a multimeter (typical value around 160 ~ 195 Ω). A faulty pump will need replacement.
- Inspect the wire harness and connector going to the drain pump for damage or loose connections.
- If these steps don’t work, the main PCB may be the cause.
Error Codes Related to Overflow or Leakage
These codes indicate that the dishwasher’s safety system has detected excess water or a leak.
- Codes: E30, F30, E:04
- Description: The dishwasher’s anti-flood system (often called MIPS or using a float switch) has been activated, indicating a potential water leak.
- Common Causes:
- An actual water leak from a component inside the dishwasher (e.g., pump seal, hose connection, valve).
- Damaged water hoses.
- A faulty overflow protection mechanism (float switch).
- A faulty water inlet valve that is allowing water to enter continuously.
- Issues with the wire harness connector.
- A problem with the main control board (PCB).
- Solutions:
- Unplug the dishwasher.
- The most important step is to find the source of the water leak. Carefully inspect the area under and around the dishwasher. Check hoses, connections, and seals.
- Once the leak source is found, you will need to repair or replace the faulty component (e.g., tighten a hose clamp, replace a cracked hose, replace a leaking pump seal).
- Check the overflow protection float switch, usually located in the base of the dishwasher. Ensure it’s not stuck and that its switch is functioning correctly. Replace if faulty.
- Verify the function of the water inlet valve to ensure it’s closing completely when the machine is off.
- Check the wire harness connector related to the overflow switch.
- If the leak is fixed but the error persists, or you can’t find a leak, the main PCB might be the issue.
Error Codes Related to Sensors (Flow, Temperature, Turbidity)
These codes point to problems with sensors that measure crucial aspects of the wash cycle.
- Flowmeter Codes: E40, F40, E41, E42, E:18 (often related to water level which uses flow/pressure)
- Description: Issues with the sensor that measures how much water is entering the machine or the rate of flow. E41/E42 indicate specific flow detection anomalies. E:18 points to an issue detecting the correct water level.
- Common Causes: Faulty flowmeter (often contains a reed switch), damaged wire harness, faulty inlet valve (affecting flow), faulty air gap chamber or pressure switch hose (E:18), faulty pressure level switch (E:18), main board failure.
- Solutions:
- Unplug the dishwasher.
- Check the wire harness connector to the flowmeter.
- Check the turbine of the flowmeter to see if it spins freely. Check the reed-switch component if possible. Replace the flowmeter if necessary.
- Verify the functionality of the water inlet valve, as issues here affect flow.
- For E:18, check the solenoid valve, clean the air trap chamber, find any air leaks in the pressure switch hose, or replace the pressure level switch.
- Check the main board.
- Temperature Sensor (NTC Thermistor) Codes: E70, F70, E:05, E:17 (can be related if sensor is faulty)
- Description: Problem with the sensor that measures water temperature. E:17 can relate to heating issues where the temperature sensor reading is suspect.
- Common Causes: Faulty NTC thermistor (temperature sensor), damaged wire harness connector, faulty main PCB. E:17 might also involve a flickering safety microswitch or a stuck heater relay.
- Solutions:
- Unplug the dishwasher.
- Check the wire harness connector to the thermistor.
- Test the resistance of the NTC thermistor using a multimeter. Its resistance changes significantly with temperature. Compare your reading to the expected values (e.g., approx. 10 kΩ at 25°C/77°F, approx. 635 Ω at 100°C/212°F, approx. 3497 Ω at 50°C/122°F). Replace the sensor if it’s open, shorted, or far outside the expected range.
- For E:17, check the safety microswitch and heater relay, but a faulty main PCB is often indicated if the error persists after checking basic components. Haier specifically mentions waiting 10 minutes and replacing the main board if E:17 persists or recurs.
- Check the main board.
- Turbidity Sensor Codes: E80, F80, E81, E82, E:09
- Description: Issue with the sensor that measures how dirty the water is. E81/E82 indicate calibration issues. E:09 means no signal is detected.
- Common Causes: Dirty turbidity sensor (food residues), faulty turbidity sensor, damaged wire harness connector, faulty main PCB.
- Solutions:
- Unplug the dishwasher.
- Check the wire harness connector to the sensor.
- Locate the turbidity sensor (usually near the drain filter) and gently clean off any food residues or buildup.
- If cleaning doesn’t help, the sensor may be faulty and need replacement.
- Check the main board.
Error Codes Related to Heating Issues
These codes indicate problems with the dishwasher’s ability to heat the water.
- Codes: E60, F60, E:08, E:14, E:16 (can be related), E:17 (can be related)
- Description: The water is not heating properly, or a heating-related safety device has tripped. E60 specifically mentions temperature increase issues. E:08 and E:14 indicate failure to heat within the scheduled time or a general heating chain error. E:16 is a pressure switch error often involved in the heating circuit.
- Common Causes:
- Faulty heating element.
- Faulty thermostat or overheat protection device (high-limit switch, self-resetting or non-resetting).
- Faulty pressure switch or pressure safety microswitch (often required for the heater to activate). E:16 specifically points to a stuck pressure switch.
- Faulty washing motor (can affect water circulation needed for heating).
- Faulty heater relay on the control board. E:17 can indicate a heater relay issue.
- Damaged wire harness (open circuit, loose connections) to the heater or related components.
- A problem with the main control board (PCB).
- Solutions:
- Unplug the dishwasher.
- Check the wire harness connectors to the heating element, thermostats, and pressure switch. Repair or replace if damaged.
- Test the resistance of the heating element with a multimeter (typical value around 30 Ω). Replace if open circuit (OL) or significantly different.
- Check the overheat protection thermostat(s). Test their continuity with a multimeter. They should show continuity (very low resistance, 0.1 ~ 1 Ω) below their trip temperature and open circuit (OL or infinite resistance) above it. Replace if faulty.
- Check the pressure switch(es). They play a role in ensuring there’s water in the tub before heating activates. Test their continuity in different states. For E:16, the switch might be stuck closed.
- Check the main wash motor and its wiring, as poor circulation can affect heating. Check the BLDC motor windings resistance if applicable (typical ~51 Ω between UV, UW, VW terminals).
- For E:14 + E:08, specifically check the pressure safety microswitch. For E:14 + E:17, check the heater relay or NTC probe (temperature sensor).
- If the heater relay is suspected (E:17), the main PCB often needs replacement.
- Check the main board.
Error Codes Related to Communication Issues
These codes mean that different electronic components or control boards within the dishwasher are not communicating with each other.
- Codes: E50, F50, E51, E52, E:10
- Description: There is a communication failure between the main control board and other components, such as the wash motor control (BLDC motor), the user interface (UI) board, or the main user control panel.
- Common Causes:
- Damaged or loose wire harness connector between the boards.
- Faulty door wire harness (if communication wires run through it).
- A faulty user interface (UI) control board.
- A faulty BLDC wash motor control board (if applicable to your model).
- A problem with the main control board (PCB).
- Solutions:
- Unplug the dishwasher.
- Carefully check and reseat the wire harness connectors between the main PCB, the UI board, and the motor control board. Look for any visible damage to the wires. Repair or replace the harness if necessary.
- Inspect the door wire harness for damage, especially where it flexes when the door opens and closes. Replace if damaged.
- If the harness is okay, one of the control boards is likely faulty. You might need to replace the UI board, the BLDC wash pump board, or the main board.
- Some models might require reprogramming the core board after replacement (For Authorized Technical Service only).
Error Codes Related to the Diverter Valve
These codes indicate a problem with the diverter valve, which directs water flow to either the upper or lower spray arms.
- Codes: EE0, FE0, E:23
- Description: The diverter valve is not reaching its intended position (upper or lower spray arm) within the expected time. The machine might run a cold wash as a fallback.
- Common Causes:
- Faulty diverter micro-motor (actuator).
- Faulty diverter micro-switch (position sensor).
- Damaged wire harness connector to the diverter.
- A problem with the main control board (PCB).
- Solutions:
- Unplug the dishwasher.
- Check the wire harness connector between the diverter actuator/switch and the main PCB. Repair or replace if necessary.
- Check the diverter micro-motor’s resistance with a multimeter (typical value around 9 kΩ). Replace if faulty.
- Check the diverter micro-switch. It signals the position. Test its continuity in different diverter positions (typical: 0.1 ~ 1 Ω in one position, ∞ Ω / OL in the other). Replace if faulty.
- If components test okay, the main PCB might be the issue.
Error Codes Related to Power Supply Frequency
These codes indicate an issue with the electrical frequency of the power supplied to the dishwasher.
- Codes: EA0, FA0, E:22
- Description: The dishwasher’s electronics detect that the frequency of the incoming power does not match the expected value (e.g., 50Hz or 60Hz depending on your region and the appliance’s design).
- Common Causes:
- An actual problem with the power supply frequency in your home (less common, usually affects multiple appliances).
- A faulty main control board (PCB) that is misinterpreting the power signal.
- Solutions:
- Unplug the dishwasher.
- Check your home’s power supply to ensure it is stable and the correct voltage/frequency for your region. This might require an electrician if you suspect a grid issue.
- If the power supply is confirmed correct, the main PCB is likely faulty and needs replacement.
Error Code Related to EEPROM
This code points to an issue with the dishwasher’s non-volatile memory (EEPROM).
- Code: E:15
- Description: The dishwasher’s EEPROM (memory chip storing settings and data) is not detected or is faulty.
- Causes: The EEPROM is faulty or not accessible by the main board.
- Solutions:
- Unplug the dishwasher.
- This often requires reprogramming the core board (For Authorized Technical Service only).
- If reprogramming doesn’t work or isn’t possible, the main PCB (which contains the EEPROM) needs to be replaced.
Other Specific Error Codes
- Washing Motor Pump Error: E:07
- Description: Problem with the main circulation wash pump motor (distinct from the drain pump). The signal from the tachometer (which measures motor speed) is not detected, or the motor is faulty.
- Common Causes: Damaged wire harness to the motor, faulty motor capacitor, faulty tachometer, faulty motor pump itself, faulty main PCB.
- Solutions:
- Unplug the dishwasher.
- Check the wiring harness between the motor and the main board.
- Check the motor capacitor if your model has one (often looks like a cylinder attached to the motor).
- Check the tachometer’s resistance (typical value around 156 Ω).
- Check the motor pump itself.
- Check the main PCB.
- Pressure Safety Microswitch Error (Stuck Closed): E:16
- Description: The pressure safety microswitch, often part of the heating circuit, is incorrectly detecting pressure/water level as being present continuously.
- Common Causes: Faulty pressure microswitch stuck in the closed position, faulty wire harness causing a short circuit.
- Solutions:
- Unplug the dishwasher.
- Check the wiring harness for shorts.
- Replace the pressure microswitch.
Indicator Light: Child Lock
- Display/Light: Lock icon lights up
- Description: The child lock feature is activated, preventing the control panel from being used.
- Cause: The child lock function has been enabled, either intentionally or accidentally.
- Solution:
- To deactivate the child lock, typically press and hold the button labelled with the “LOCK ICON” or similar for about 3 seconds, or until the lock icon LED turns off.
- Note: The specific button and duration can vary between models. Always consult your dishwasher’s user manual for the exact procedure.
Consolidating Ohmic Values & Temperature Charts
For testing components with a multimeter:
- Water inlet valve: 3.2 ~ 4 kΩ
- Drain pump: 160 ~ 195 Ω
- Heater assembly: ~30 Ω
- High-limit thermostat (Self-reset): 0.1 ~ 1 Ω below ~100℃, ∞ Ω / OL above ~101℃
- High-limit thermostat (Non-reset): 0.1 ~ 1 Ω below ~205℃, ∞ Ω / OL above ~206℃
- BLDC wash motor (between UV = UW = VW terminals): ~51 Ω
- NTC thermistor (Temperature/Turbidity sensor):
- 25°C / 77°F: 10000 Ω (10 kΩ)
- 50°C / 122°F: 3497 Ω
- 100°C / 212°F: 635 Ω
- Diverter micro-motor: ~9 kΩ
- Diverter micro-switch: 0.1 ~ 1 Ω (IN position), ∞ Ω / OL (OUT position)
- Washing motor tachometer: ~156 Ω
General Troubleshooting Tips
Before you dive into specific error code fixes, try these basic steps:
- Power Cycle: Unplug the dishwasher for 5-10 minutes, then plug it back in. This can sometimes reset the control board and clear temporary errors.
- Check the Door: Ensure the dishwasher door is securely latched.
- Check Water Supply: Confirm the water tap is on and the supply hose isn’t kinked.
- Check Drain: Make sure the drain hose isn’t kinked and your sink drain/disposal is clear.
- Clean Filters: Regularly clean the food particle filters at the bottom of the dishwasher tub.
Remember to always refer to your specific Haier dishwasher model’s user manual for the most accurate information regarding error codes and troubleshooting procedures.
Good luck getting your Haier dishwasher back up and running smoothly!
