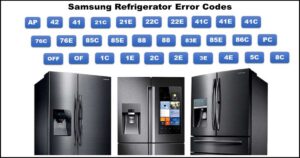
Troubleshooting the Samsung Refrigerator 4C or 4E Error Code: A Comprehensive Guide
Encountering the 4C or 4E error code on your Samsung refrigerator can be a frustrating experience, often indicating an issue that could impact your appliance’s ability to maintain optimal temperatures. This guide will delve into the potential causes behind these error codes and provide clear, step-by-step instructions to help you troubleshoot and resolve the problem.
Samsung Refrigerator 4C or 4E Error Code Explained
The 4C and 4E error codes on a Samsung refrigerator are typically related to the freezer defrost sensor or the associated circuitry. While the exact meaning can sometimes vary slightly depending on the specific model, they most commonly indicate that the refrigerator’s control board has detected an anomaly with the sensor responsible for monitoring the temperature during the freezer’s defrost cycle.
Essentially, this means the refrigerator is having trouble accurately sensing the temperature needed to initiate or complete the defrost process, which can lead to frost buildup if not addressed. In some instances, particularly on models with water and ice dispensers, these codes could also potentially relate to the water supply line temperature sensor, although the defrost sensor is the more prevalent cause. For the purpose of this guide, we will focus on the more common freezer defrost sensor issue.
Potential Causes of the Samsung Refrigerator 4C or 4E Error Code
Several factors can trigger the 4C or 4E error code:
- Water Ingress or Corrosion: Moisture or water exposure can lead to corrosion in the wiring harness or connectors linked to the freezer defrost sensor. This corrosion disrupts the electrical signals between the sensor and the main control board, resulting in the error.
- Damaged Wire Harness: The wiring that connects the freezer defrost sensor to the main control board can become damaged, pinched, or faulty over time. Any break or short in these wires will interrupt communication and trigger the error code.
- Faulty Freezer Defrost Sensor: The sensor itself may be defective. If the sensor fails to accurately read and report the temperature, or if it develops an internal open or short circuit, the control board will register this as an error.
- Open or Short Circuit in the Sensor Circuit: This refers to an electrical fault within the sensor or its wiring. An open circuit means there’s a break preventing the flow of electricity, while a short circuit indicates an unintended pathway for the electrical current, both of which disrupt the sensor’s function.
- Defective Main Control Board: The main control board is the brain of the refrigerator. If it malfunctions, it may incorrectly interpret the signals from the defrost sensor or fail to send proper voltage to the sensor circuit, leading to the 4C or 4E error display.
Troubleshooting and Solutions for the Samsung Refrigerator 4C or 4E Error Code
Before you begin any troubleshooting, always unplug your refrigerator from the power source to avoid the risk of electric shock.
Here are the steps you can take to diagnose and potentially fix the issue:
1. Check for Water Ingress and Corrosion
- Action: Disconnect the refrigerator from power. Locate the wiring harness connected to the freezer defrost sensor and the main control board. Inspect the connectors and wiring for any visible signs of moisture, water damage, or corrosion (green or white powdery residue).
- Troubleshooting: If corrosion is present, carefully clean the affected areas using a soft brush and a solution of equal parts water and white vinegar or isopropyl alcohol. Ensure the connections are dry before reconnecting. If the wiring harness is significantly damaged by corrosion, it may need to be replaced.
2. Inspect the Sensor Wire Harness for Damage
- Action: With the power still disconnected, visually inspect the entire length of the wire harness running from the freezer defrost sensor to the main control board. Look for any pinches, cuts, frays, or signs of heat damage. Also, ensure all connectors are securely plugged in.
- Troubleshooting: If you find any damage, the wire harness will likely need to be replaced. Ensure the replacement harness is specifically designed for your Samsung refrigerator model. Reconnect any loose connections firmly.
3. Test the Freezer Defrost Sensor
This step requires a multimeter to measure electrical resistance.
- Action: Disconnect the refrigerator from power. Locate the freezer defrost sensor (it’s usually clipped onto a pipe near the evaporator coils in the freezer compartment). Disconnect the sensor’s wire connector from the main control board or at a convenient access point. Set your multimeter to measure resistance (Ohms – Ω). Place the multimeter probes onto the two terminals of the sensor’s connector.
- Troubleshooting: The sensor’s resistance changes with temperature. At room temperature (around 25°C or 77°F), a typical Samsung defrost sensor should measure approximately 5 to 10 kiloohms (k$\Omega$). You can also test the sensor in a cup of ice water (0°C or 32°F), where the resistance should be significantly higher, often in the range of 20-30 k$\Omega$.
- If the multimeter shows a reading of infinite resistance (OL or similar), the sensor has an open circuit and is faulty.
- If the multimeter shows a reading close to 0 Ohms, the sensor has a short circuit and is faulty.
- If the resistance reading is significantly outside the expected range for the corresponding temperature, the sensor is likely inaccurate and should be replaced.
- Solution: If the sensor is determined to be faulty, it needs to be replaced with a genuine Samsung part compatible with your refrigerator model.
4. Check the Sensor Circuit for Open or Short
This step also requires a multimeter and involves checking the wiring independently of the sensor.
- Action: With the refrigerator still unplugged, disconnect the sensor from its wire harness connector. Set your multimeter to measure resistance. Place the multimeter probes on the two terminals of the wire harness connector that plugs into the sensor (not the sensor itself). This tests the continuity and resistance of the wiring leading back to the main board.
- Troubleshooting: You should get a reading that indicates continuity (a specific Ohm value, not OL or close to 0) if the wiring is intact. If the reading is infinite resistance (OL), there’s an open circuit somewhere in the wiring. If the reading is close to 0 Ohms, there might be a short in the wiring.
- Solution: Tracing and repairing or replacing the damaged section of the wire harness is necessary if an open or short is found in the wiring itself.
5. Test the Voltage to the Sensor (Advanced)
This step involves working with live electrical components and should only be attempted by someone comfortable and experienced with electrical testing.
- Action: Reconnect the wire harness to the defrost sensor. With the refrigerator plugged in and running, set your multimeter to measure DC voltage (Vdc). Carefully and safely access the main control board. Locate the connector for the freezer defrost sensor on the main board (consult your service manual if needed). With the probes, measure the DC voltage across the two terminals on the main board connector where the sensor harness plugs in.
- Troubleshooting: The voltage supplied to the defrost sensor circuit typically falls within a specific range, often between 1.2 Vdc and 4.8 Vdc, though this can vary by model. A reading significantly outside this range, particularly 0 Vdc or a constant 5 Vdc (or higher), could indicate a problem with the main control board’s ability to regulate the sensor circuit.
- Solution: If the voltage reading is incorrect and you have confirmed the sensor and wiring are good, the main control board is likely defective and requires replacement.
6. Consider a Defective Main Control Board
- Troubleshooting: If you have systematically gone through the above steps, confirmed that the sensor and wiring are functioning correctly, and the 4C or 4E error code still persists, the main control board is the most probable cause.
- Solution: Replacing the main control board requires careful attention to detail and ensuring the replacement part is compatible with your specific refrigerator model. Due to the complexity and cost of this component, and the risk of damage or electrical hazard, replacing the main control board is often best left to a qualified appliance technician.
When to Call a Professional
While some of these steps are manageable for a DIY enthusiast, there are situations where calling a qualified appliance repair technician is the safest and most practical option:
- You are not comfortable working with electrical components or using a multimeter.
- You cannot locate the sensor or access the wiring harness or main control board.
- You’ve performed the troubleshooting steps and cannot identify the cause of the error.
- Replacing the sensor or wire harness does not resolve the issue.
- The troubleshooting points towards a defective main control board.
A professional technician has the experience, tools, and knowledge to accurately diagnose the problem and perform the repair safely and effectively.
Conclusion
The 4C or 4E error code on your Samsung refrigerator can be traced back to issues with the freezer defrost sensor or its associated wiring and control system. By following the troubleshooting steps outlined in this guide, you can systematically investigate the potential causes, from simple water ingress to a faulty main control board. Remember to prioritize safety by always disconnecting the power before inspecting or testing components. With a bit of patience and careful work, you may be able to resolve the error yourself and get your refrigerator running smoothly again. If you encounter difficulties or the issue persists, don’t hesitate to seek assistance from a qualified appliance repair professional.